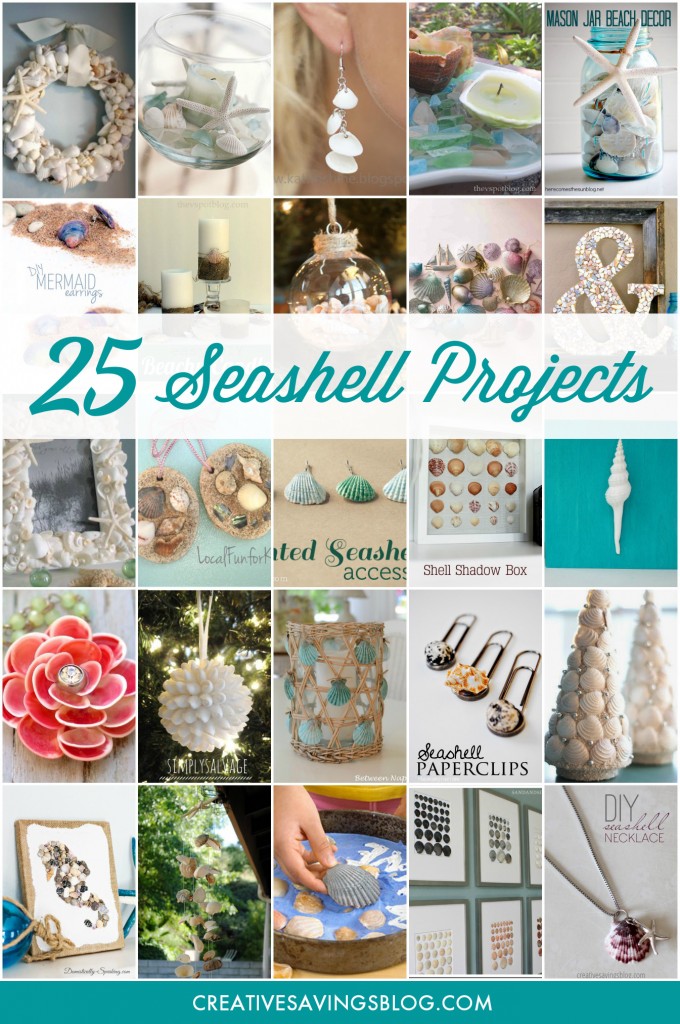
25 Stunning Seashell Projects

Okay, I’m just kidding. Really, I won’t hold a grudge, but we have so many beautiful shells on our beaches that are absolutely FREE for the taking!
I know, I know.
Not everyone lives close to a beach, which can make the task of collecting shells a bit difficult. But if you LOVE coastal decor, and take a vacation near the beach every once in a while {or have a friend that does}, these trips are now a perfect excuse to collect hoard free craft supplies for a greater purpose.
You can do practically anything with a handful of pretty shells, and I thought it would be fun to share a few of my favorite projects from around the blogosphere. My growing collection of seashells could definitely use the extra inspiration!
Seashell Projects – Jewelry:
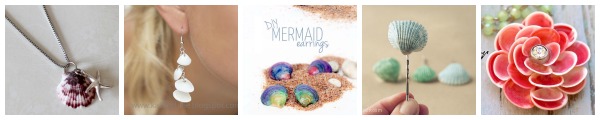
1. DIY Seashell Necklace: It doesn’t get any simpler than drilling a single hole through your favorite shell, adding a charm, and chain. This piece of jewelry reminds you of your trip every time you wear it.
2. Dangling Seashell Earrings: These tiny seashells are practically everywhere you look {or step} on the beach, and while you would technically need hundreds to fill a shadow box or hurricane vase, they’re perfect for delicate earrings.
3. Mermaid Earrings: I don’t know why I never thought of painting shells, but small bottles of nail polish can go a long way and create a really unique look. These post earrings would be fun to do at a girly slumber party!
4. Hair Accessories: You can easily turn seashells into barrettes, attach them to bobby pins, and glue them along headbands to complement any outfit.
5. Seashell Flower Necklace: I had no idea shells could look so pretty upside down. Isn’t this design exquisite? Glue these flowers to the inside of a frame if you want to create your own wall art instead.
Seashell Projects – Ornaments:
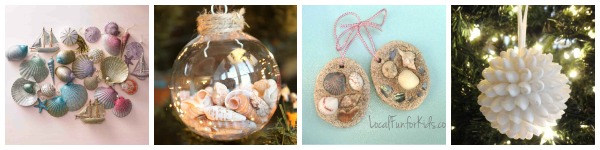
6. Seashell Ombre Ornaments: Anyone else a sucker for glitter? These would look so pretty hanging on a Christmas tree. I can only imagine the light would make them even more sparkly and beautiful.
7. Glass Ball Ornament: Craft stores sell loads of clear ball ornaments, and you can fill each of them with sand and seashells collected from past vacations. Just remember to slip a piece of paper inside with the date and place so you don’t forget where they came from!
8. Clay Seashell Ornaments: Get the kiddos involved with their very own seashell project. This homemade clay recipe is easy to make, and kids can help roll the dough and press their favorite treasures on top.
9. Shabby Chic Shell Ornament: This stunning ball is absolutely beautiful covered in skinny, “closed in” type shells. I’m going to look for these on my next trip!
Seashell Projects – Wall Art:
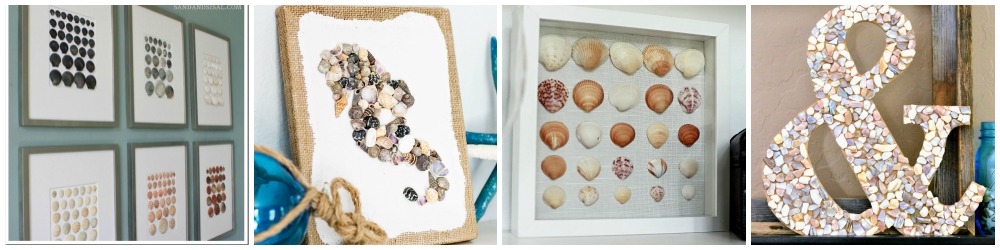
10. Gallery Wall Shell Art: My coastal-inspired living room could definitely use a gallery wall of these beauties. I love how these are arranged by color and size!
11. Seashell Seahorse: How gorgeous is this seashell seahorse? {Say those 2 words 10 times fast!} I bet you could make a silhouette of practically anything though with enough shells. Burlap canvas adds a pretty rustic touch too.
12. Shell Shadow Box: Instead of framed art, create a shadow box to house your shells. I’ve also seen shadow boxes with sand in the bottom and your beach finds scattered inside.
13. Seashell Ampersand: This project starts with a wooden ampersand from the craft store that you cover completely in shells. I think it would add lovely dimension to a mantle or gallery wall.
Seashell Projects – Decor:

14. Shell Art Boxes: Glue your prettiest shells on top of painted boxes to add a beach-inspired touch. These make the perfect holder for smaller goodies — like seashell jewelry!
15. Jute-Wrapped Candle Holders: I am dying to make a few pairs of these rustic candle holders. I think they would look so pretty on the back porch for late night Summer gatherings.
16. Sand and Shell Pillar Candles: Plain pillar candles, sand, and a few seashells are all you need to make this one-of-a-kind centerpieces. So I guess while you’re collecting shells, you might want to grab a few handfuls of sand too!
17. Seashell Paperclips: You only need 2-3 shells to make this simple souvenir for friends. I think this would also make a fun bookmark for everyone who loves to read.

18. Seashell Mason Jar: I know I have a ton of mason jars lying around, and it couldn’t get any easier to fill them with shells for a vintage look. I have yet to find a starfish that big though…..and all in once piece!
19. Seashell Wreath: If you like changing your outdoor wreath with the seasons, a beachy one is a must for Summer. This one is absolutely stunning, don’t you think?
20. Seashell Candles: No need to spend high prices on Pottery Barn decor. This knock-off idea turns seashells into candles simply by filling them with wax. I never would have thought of this!
21. Seashell Wind Chime: I’m not a huge fan of wind chimes, but if you enjoy listening to them, it’s easy enough to make your own. Try varying shapes and sizes of shells to create different sounds.
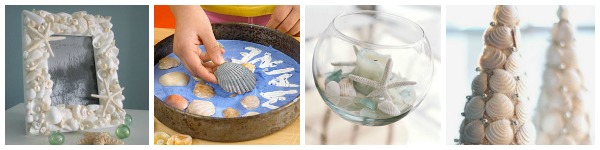
22. Seashell Embellished Frame: Turn an old frame from plain to pretty with shells collected from your trip. Then put a picture inside from your vacation for instant memories.
23. Seashell Stepping Stone: Kids love collecting their own set of shells, and you can display them at home with a simple stepping stone project. Gives instant charm to the backyard flower bed!
24. Seashell Centerpiece: In a clear fishbowl, arrange your beachy finds with a little bit of sand and a candle. Use as an instant centerpiece for the dining room table, or as a pretty shelf decoration.
25. Seashell Christmas Tree: Cover a styrofoam tree in sand, then add shells to the outside for a beach-inspired Christmas. These look super easy and fun to make!
As I was pulling these seashell projects to share, I kept thinking how one simple supply can easily be turned into a work of art. Now I can’t wait for my next beach visit — I have 25 excuses to collect a few more!
If you love a good craft project, here’s a couple more ideas you should add to your list:
Or, you can head over to this page for a peek at all my projects!
I’d like to make some green limpet shell trees like 9″ & 12″, but I do not know how many shells to purchase. Does anyone have any suggestions? I appreciate any suggestions if any of you have made them. I have looked every where online and cannot find answers. 50 or 100 each tree?
Thank you for any help. Jackie
Hi Jackie, I’m afraid I don’t have an exact answer to your question, but you could always start with less and then go back to the store if you need more! Or purchase extra and plan to return what you don’t use.
I soak my seashells in Dawn antibacterial soap and Clorox and if I want them to be really white I rinse them well and then let them sit in Peroxide for a few hours then rinse and let dry on paper towels.
Oh smart! I bet they look so pretty after that!
I go from coast to coast here in central Florida and I am never disappointed with my finds . I make wreaths with light, Christmas ornaments, boats , fish screens ,. It’s my therapy
That’s good therapy! My therapy is sunshine, which usually goes hand in hand with seashells. 😁
im planing on using sea shells in different ways for a beach wedding and a under the sea
That’s a great idea for a wedding. You’ll have so many unique and beautiful decoration options!
When I bring home shells from the beach, I put a small amount of bleach in a bucket and fill with water. Gently put them in the solution and soak the shells for a about 3-5 min. Rinse them in another bucket of clean water which you can set out for about 30 min. Then I place them on a towel in the sun and let them air dry.
You’re done – go crafting with them!
Thanks so much for the tip, Sandy! I’ve always had to air out the shells much longer to get rid of the smell. I’m going to try this after our next trip to the beach!!
How do you clean your harvested shells so they don’t smell?
I rinse them in fresh water right when I get home, and then lay them out to dry on a kitchen towel for about a day. I’ve never had a problem with them getting stinky that way!
Never harvest a live shell
That’s right. Always make sure there’s no creature inside before you take it home!