How to Distress New Wood (Fixer Upper Style)
This post may contain affiliate links. Read my full disclosure policy here.


Anyone else here a Fixer Upper fan?
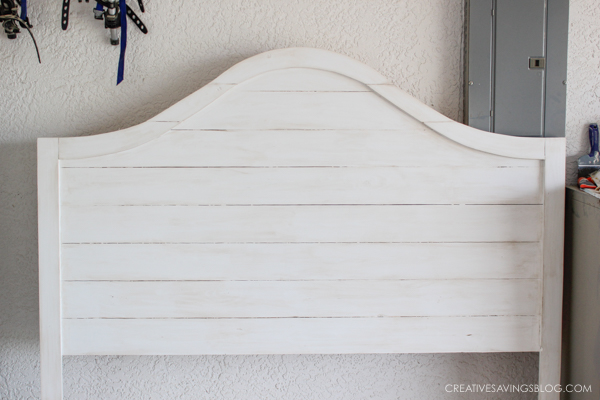
I absolutely adore Chip and Joanna Gaines, and when I saw their home featured in an HGTV magazine, I immediately fell in love with her signature style. But the room I couldn’t stop pining over was her bedroom……particularly the headboard.
Ohhh, I just L-O-V-E her headboard!!
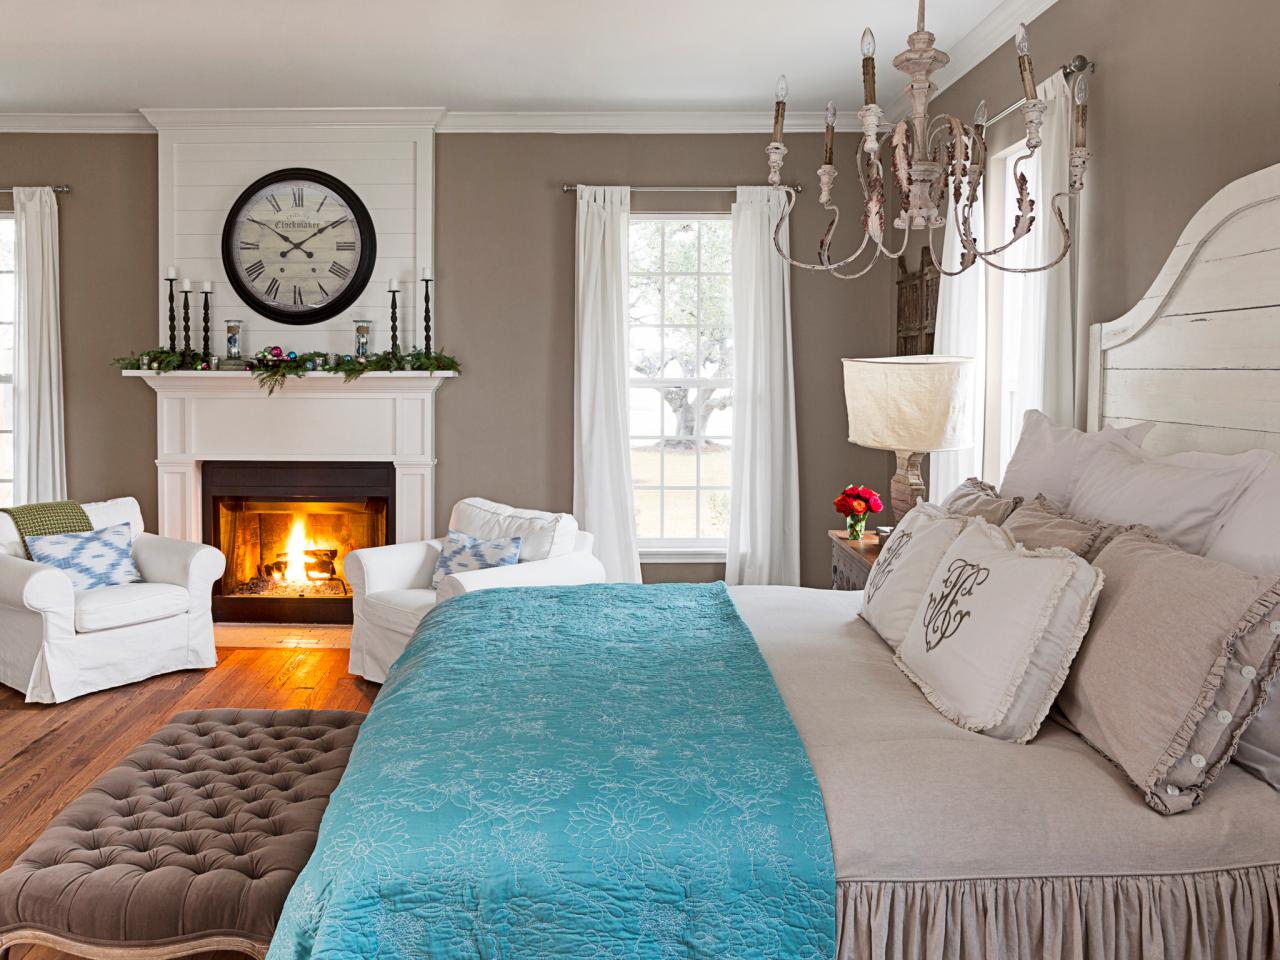
I had been on the lookout forever searching for just the right headboard, but could never find it. Here is was, in Joanna’s bedroom…..well, at least half of it.
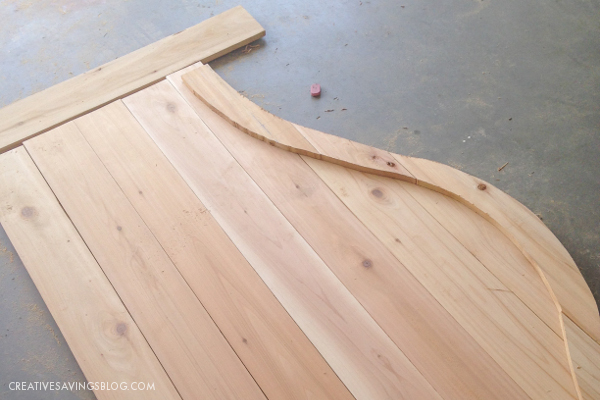
When I showed the photo to Joseph, I asked if he thought he might be able to make it for me. He tentatively said yes, so we drew the design out on graph paper, bought the supplies, and then invited a friend over one afternoon to help and lend his expertise.
Head’s Up! We’re now offering plans to build this headboard! Nab ’em HERE.
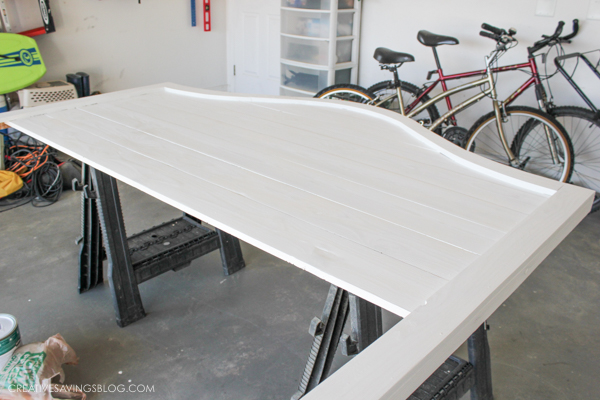
After fitting and securing all the pieces together, it was time to distress the headboard Fixer Upper style, all of which I have never done before to any kind of furniture, let alone brand new wood. Thankfully, I read a ton of tutorials online and was able to piece together what I needed to buy to achieve the end result.
Now that I know how to do this technique, I’m anxious to work a little Fixer Upper magic on all my other furniture pieces!
Supplies Needed:
- Water-based Primer
- Semi-Gloss White Paint
- Chocolate Brown Paint Sample
- Behr’s Faux Glaze {no longer sold by Home Depot! Bummer! I can’t be 100% positive this Lowe’s Glaze will net the same result, but it is the closest alternative I can recommend}
- Polyuréthane
- Paintbrushes {both bristle and foam}
- Sandpaper and Sanding Blocks
- Paper Towels or Rags
How to Distress New Wood:
Step 1: Sand furniture smooth {if needed}, and prime with one coat water-based primer.
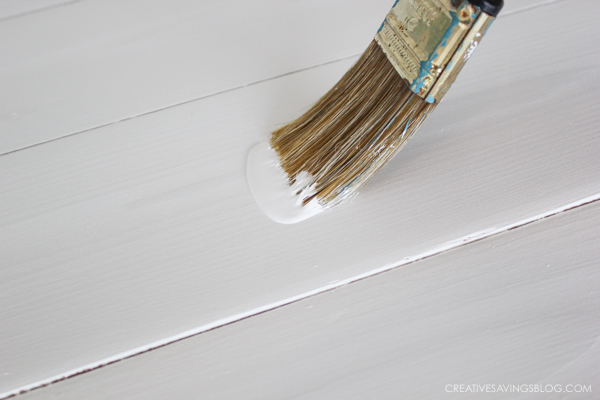
Step 2: Paint with a semi-gloss paint in a white or ivory color. I used the color Polar Bear from the Behr line at Home Depot. Two coats of this were enough to cover all the crevices.
Step 3: Now on to the distressing part……which was a form of distress in itself. I was so worried about messing up! But thankfully, you really can’t.
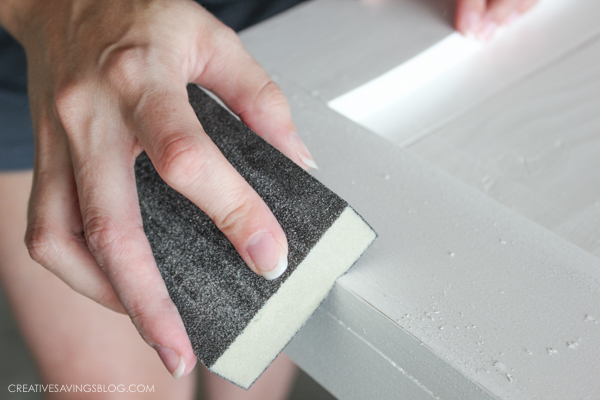
Using a sanding block, sand along all the edges where there would most likely be natural wear. I alternated between sanding hard in some spots and soft in others so it looked “random”.
For the slats in between where the boards fit together, we folded sanding paper halfway and ran it inside the grooves so they would stand out a little bit more too. Sorry I don’t have a photo of that step!
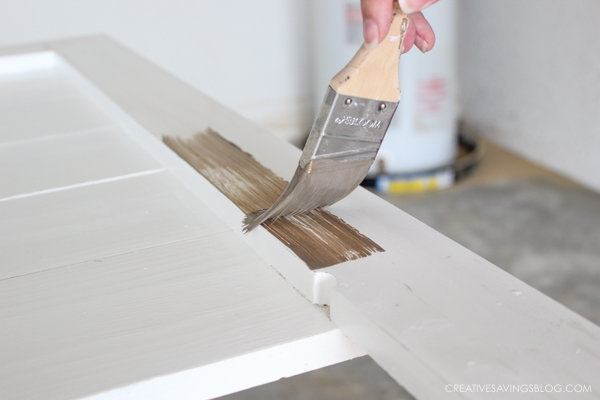
Step 4: Mix a 50/50 ratio of chocolate brown paint {I used Glidden’s Monterey Cliff} with a can of Behr’s Faux Glaze {again, unfortunately Home Depot doesn’t carry this anymore, so I recommend this instead}. I had to ask where this was because I couldn’t find it at first, but it’s in the paint section at Home Depot.
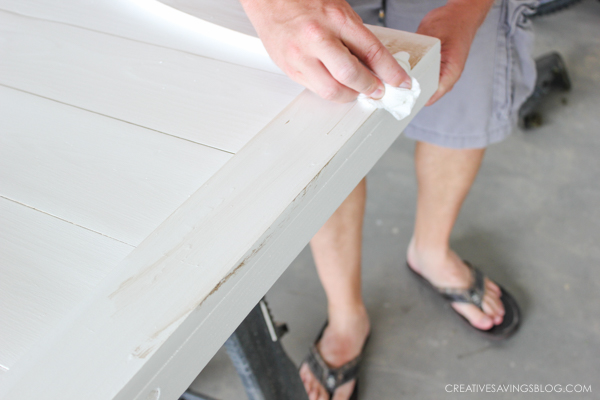
Then paint a medium amount {not too much, but not too little} of the paint onto furniture and wipe off immediately with a paper towel or rag. The paint settles into the grooves you’ve just sanded and gives it that antique/Pottery Barn/Fixer Upper look.
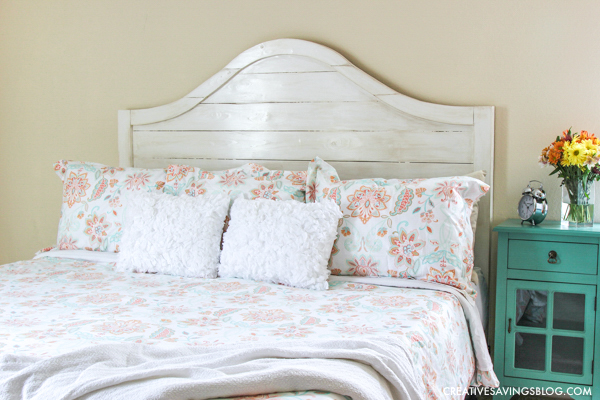
At first, I didn’t think I would like the way it turned out at all, because it looked so “dirty” next to the stark white of the rest of the headboard, but when it was all said and done, it turned out exactly as I had imagined!
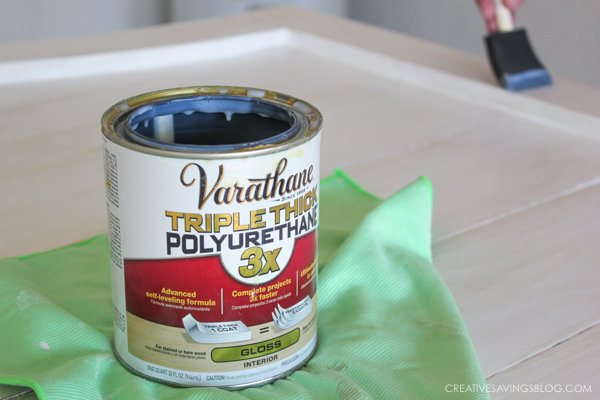
Step 5: When everything is dry, give your piece of furniture a final coat of Polyurethane to seal everything in and give it a nice shine.
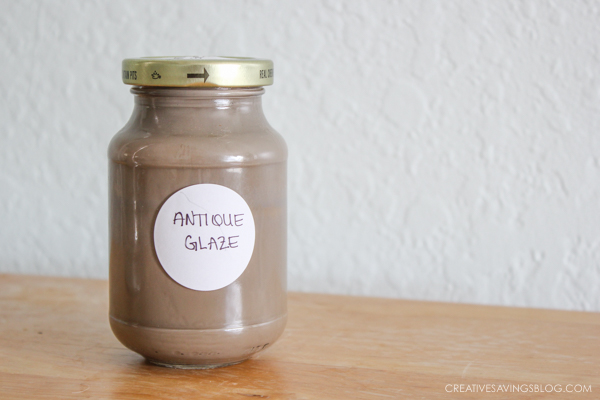
I still had plenty of the brown paint/faux glaze mix, so I popped into a jar and labeled Antique Glaze to use it later. There’s so many other pieces of furniture I want to do this to now!
I thought about calculating what I spent minus the wood for this project, but I have so much product left over {paint, glaze, polyurethane, etc} that it makes it really difficult to figure out. The nice thing is though, I now have all the supplies to do this technique again and again.
If you’re interested in building the headboard like we did, you can get the plans below:
OR, if you prefer to buy a headboard and want to save yourself the work, here are similar options that would still complement your style.
[show_shopthepost_widget id=”4527551″]
Are You a Fan of the Show Fixer Upper?
Disclosure: Some of the links in the post above are affiliate links. This means if you click on the link and purchase the item, I will receive an affiliate commission. Regardless, I only recommend products or services I use personally and believe will add value to my readers. Read my full disclosure policy here.


Hi, I have purchased the plans, built the headboard, and now I’m ready to paint. I was wondering if after you make your antique glaze you painted it over the entire surface or just the parts you sanded? Thanks
Hi Eric,
We put the glaze over the entire headboard. 🙂
Apparently Home Depot doesn’t carry the Behr Faux Glaze anymore and I cant find it anywhere online to purchase it. Any suggestion for an alternative glaze?
Another idea is to try Lowe’s version: https://www.lowes.com/pd/Valspar-Clear-Glaze-Actual-Net-Contents-16-fl-oz/999918132 I haven’t tested this one yet, but it looks very similar to the Behr one!
Thank you!! I will try that…A couple more questions…sorry never distressed anything in my life and want it to turn out good🤦🏻♀️
1) Did you use a “white” water based primer?
2) Did you use latex or oil based paint for your full coverage on the table?
3) What kind or paint did you use to mix with your glaze? Satin, semi gloss…oil or latex?
All the paints we used were water based – and I believe the brown paint was a semi-gloss. It won’t really matter as much on that because the poly adds a “sheen” to it when it’s all done.
I just went to Home Depot and they do not have the Behr’s Faux Glaze. Do you suggest another glAze I could use? I don’t know much about the Behr’s glaze to compare to another glaze. Thank you!
I’d look for any other water-based glaze and then check for reviews of it online to make sure it has preformed well for others.
Saw this after I posted my comment. Was the Behr Faux Glaze a clear or dark glaze? Trying to find some as close as possible.
It was clear. Hope that helps! I’ll have to update my tutorial. 🙂
From other comments I’ve gathered that your headboard isn’t connected to anything. We also have carpet in our bedroom and could probably get away without attaching our headboard to anything. What do you use as bed frame?
We just have a standard metal adjustable {one size fits all} bed frame.
A couple of options for attaching if you are interested: If you put another cross beam at the height of the bed frame you could easily attach the headboard. Or you could also attach the headboard directly to the wall if you wanted.
Hi! How long did you wait to let the paint dry before you started the distressing/sanding part? Thank you for this post…I am working on my daughter’s bed right now and this has been helpful!
We had a day between those 2 steps. I would follow the instructions on the paint can since you’ll be being a little aggressive with it. You don’t want it to peel because it’s not fully dry!
Ok…thank you so much!
Could you tell me what kind of lumber you used please?
We used rough cedar. It took a LOT of sanding though, so I recommend whatever you use, make sure it’s not rough to begin with. 🙂
I would not advise to use polyurethane on anything white. It will yellow over time. Instead, use a water based polycrylic.
Thanks for the tip, Katy.
Hi! Do you happen to remember the name of the duvet cover from Garnet Hill? Thank you!
Hi Claire,
I don’t off the top of my head. I went back to their website and it looks like they don’t have it anymore. 🙁
Love the bed! How is everyone attaching this to the frame? Or wall? I bought the plan but it doesn’t elaborate on that.
Hi Kari!
We didn’t attach ours to the bed. We thought about attaching it to the wall by putting a cross piece 2/3 to 3/4 of the way down (where it would be hidden by the mattress. But the way our bed and bedroom is set up, it just lays perfectly against the wall. Some of that may also be because the carpet on our floor keeps our bed from shifting over time.
If you want to attach it to your frame – it would depend entirely on what type of frame you have. If it’s a simple metal frame with holes for headboards, you could drill holes in the legs and bolt it on.
I would love the plans to this headboard if at all possible! 🙂
Sure Holly! You can find the plans here!
I would like to order the plans, but first would like to know if they include the rail plans, that will connect the headboard & footboard? They would allow it to be more stable. Also I have a queen size (60″X 80″) which might be a little challenging for me. Could U advise please. I am a novice w/building.
Hi Kathy,
They don’t include any rail plans. Our headboard is free standing but you could modify it to attach it to a metal bed frame if you wanted to. You would need to modify the width measurements in order to fit a queen size bed but that is pretty much just measuring the width of your bed and using that figure to do the rest.
Love the head board! Do you have the plans or know where I can get them?
Hi Megan. You can get the plans here.
I was wondering if you had the plans for the headboard? I love it!
Come back to this post at the end of the week and they should be there! Just wrapping up the final touches on them.
Sent you an email!
Hi Kalyn, when will you be posting the plans for this beautiful, beautiful headboard? It looks amazing!
Hopefully by the end of this week!
Sent you an email!
What is the wall color?
I’m not sure, Jude. The previous homeowner had painted it that color and we’ve actually repainted since this photo. I believe it was a Behr brand paint though if that helps.
I tried to build this same headboard last weekend. My arch is not as nice as yours is. Good job. Please let us know when you post your plans.
That was by far the trickiest part. I’ll have the plans ready sometime after April 11th.
Sent you an email!
Where did you find that comforter set?
It’s actually a duvet cover that I bought from http://www.garnethill.com. Then I just got a duvet insert from Target. I love it!
Do you have the plans/instructions on hw to build the headboard?
Hi Barb! Actually yes! I hope to make them available next week!
Oh please post them because I LOVE this headboard!!! It is beautiful!
Sent you an email!
I would love to see your tutorial for the headboard as well! I plan to do the distressing on a few of my other pieces I re-finished. I am a huge fixer upper fan as well
Sent you an email!
Can you send the headboard plans to me too please [email protected]
Hi Amber! There is a link in the post now where you can download them!
They are coming! 🙂 I got wrapped up in this exciting book launch, but once it’s complete I’ll get the plans posted.