Evernote 101: How to Create a Completely Organized Digital Filing Cabinet
This post may contain affiliate links. Read my full disclosure policy here.
There are a lot of tools I use to organize my entire life—the Todoist app, my bullet journal, my phone calendar, etc. They all work seamlessly together to make sure I don’t forget anything and know exactly what projects I need to tackle next!
Today though, I want to go deeper into one of my favorite digital tools…Evernote.
I’ve been using Evernote for about 5 years now, and I’m in love. At first, I simply saved a few articles from the internet that I wanted to reference again and again, but now it’s become my digital filing cabinet for just about everything (but here’s how I organize my actual filing cabinet and decide what to keep where!)!
In fact, one of my long-term goals is to go as paperless as I can—especially with bills, statements, and all sorts of random information. Evernote allows me to do all that and more, while keeping me super organized in the process.
If you’re curious about how to use Evernote, this post will give you a general overview of what you need to know. Don’t feel intimidated, because I’ve read just about every Evernote-related book and article out there. I’ll only give you the top tips that I have found incredibly useful myself!
Free Mini Course
Are you ready to master your schedule and focus on what’s truly important? This 3-day Priority Planning Mini Course helps you break free from a to-do list that overwhelms, so you can accomplish ALL of your top priorities. Each day gets sent directly to your inbox, and best of all, it’s FREE!
1. Think of Evernote as an Online Reference Center
First things first—there are SO many things you can do with Evernote, that it’s easy to get swept away in all the cool features and try to use every single one of them. I have found that it’s much more beneficial to define Evernote as an Online Reference Center rather than a Task Management System.
When I say “reference center,” I mean information that you might need to reference at some point. These can be things like:
- Receipts
- School schedules
- Inspirational articles from the internet
- Clothing sizes
- Medical bills
- Owners manuals
- Notes from a favorite book
Basically, anything that is important enough for you to save, but you don’t want taking up precious office or counter space—documents, screenshots, PDF’s, etc. Plus, everything is searchable!!
Some people use Evernote for a running list of ideas and tasks, but for me, they get lost if I try to keep them in Evernote. Instead, I use Todoist and my Bullet Journal for things I need to “interact with” often, and Evernote for things I want to find later.
2. Create an Organization System
Evernote is currently made up of Notebooks, Notebook Stacks {which are groups of Notebooks}, Notes, and Tags. All information you save is done in a new Note, then organized into Notebooks, Stacks, and Tags.
When I first started, I made the mistake of using too many Notebooks—one for each topic. The problem was, I had Notes that could belong in three, sometimes four different Notebooks! I’ve found that the key to making Evernote work, is to use a minimal amount of Notebooks, and use Tags as a more specific and efficient way to organize all your information.
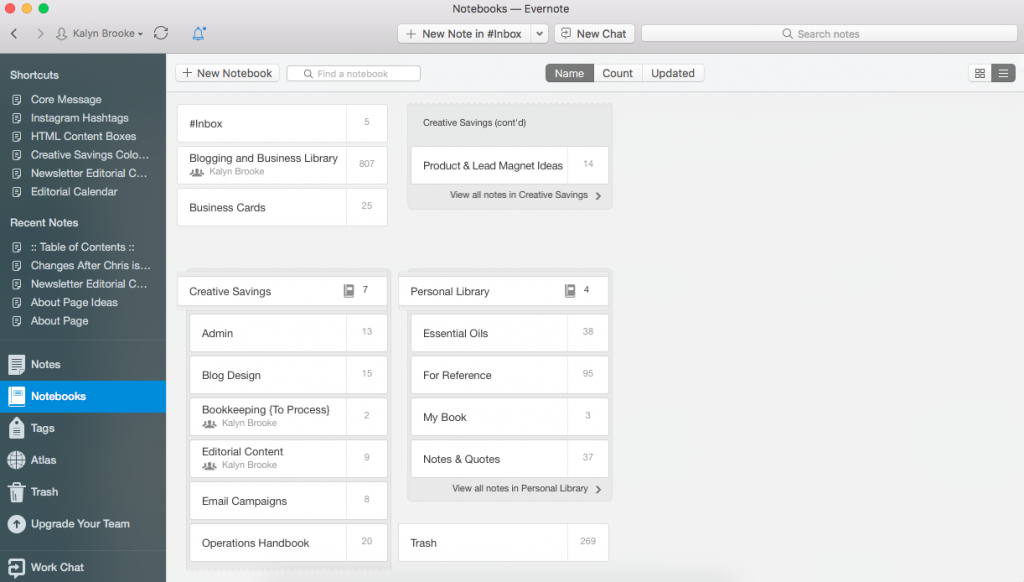
As an example, here are the Notebooks I have:
- Inbox – This is where I put everything I want to save. I don’t think about where it needs to go, I just save it to my “Inbox”. Then once a week, I process that folder and organize all the notes inside.
- Blogging & Business Library – All blogging/business related articles go in here, and I tag them with different topics {SEO, Email Marketing, Pinterest Tips, etc}. That way, when I’m educating myself about a certain aspect of my business, I can easily reference all the articles and notes I saved regarding that topic.
- Business Cards – Instead of having multiple business cards floating around, I take a photo of each and save it directly to Evernote. It’s so nice to have all that information at my fingertips, rather than searching through junk drawers trying to find that one card I know I have somewhere!
I also have two Notebook Stacks:
- KalynBrooke.com – Under this Stack, I have an Admin Notebook, Bookkeeping Notebook, Email Campaigns, Operations Handbook, Product & Lead Magnet Ideas, and then a Notebook for whatever big project I’m working on that needs to be separate for the time being.
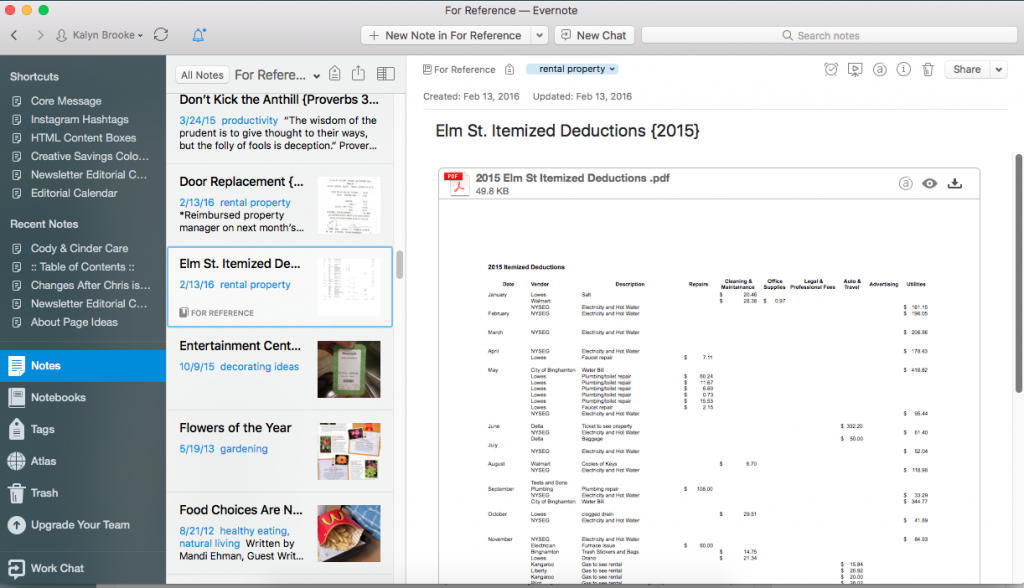
- Personal Library – This is another Stack which contains Essential Oil Information, Notes & Quotes {from books I’ve read}, a book that will probably never get published {Ha!}, and a general Notebook labeled “For Reference” that most everything gets thrown into.
Remember, every Note that is part of a Notebook can have as many tags as you wish. Tags are where I get super specific, and if I’m doing a search, I’ll generally look through my tags to find what I need. Although to be honest, Evernote search is so powerful, you can pull up anything {even your own handwriting} with just a simple word search!

In regard to Tags, my #1 tip is to avoid tagging notes with the same wording that can be found in the actual note. Be extremely specific.
For instance, if I’m saving a post about “How to Shape Your Eyebrows”, I’m not going to tag it “eyebrows”, because an Evernote search will bring up that note easily. However, I am going to tag it “health & beauty”, because I have multiple articles that belong under that tag.
BONUS TIP: You can also search within specific notebooks or tags to find what you need a lot quicker. Using the example above, you would type: Tag: Health & Beauty // then search for “eyebrow”.
3. Start Saving Things to Evernote
Once you have an idea of HOW you want to organize information, you’re ready to start saving things to Evernote! There are a few different ways you can do this:
- Create a New Note or Notebook – Click on “+New Note” to pull up a blank note or “+New Notebook” to create an entire Notebook. You can start typing, drag in a PDF, save a photo, or attach a file to any note.
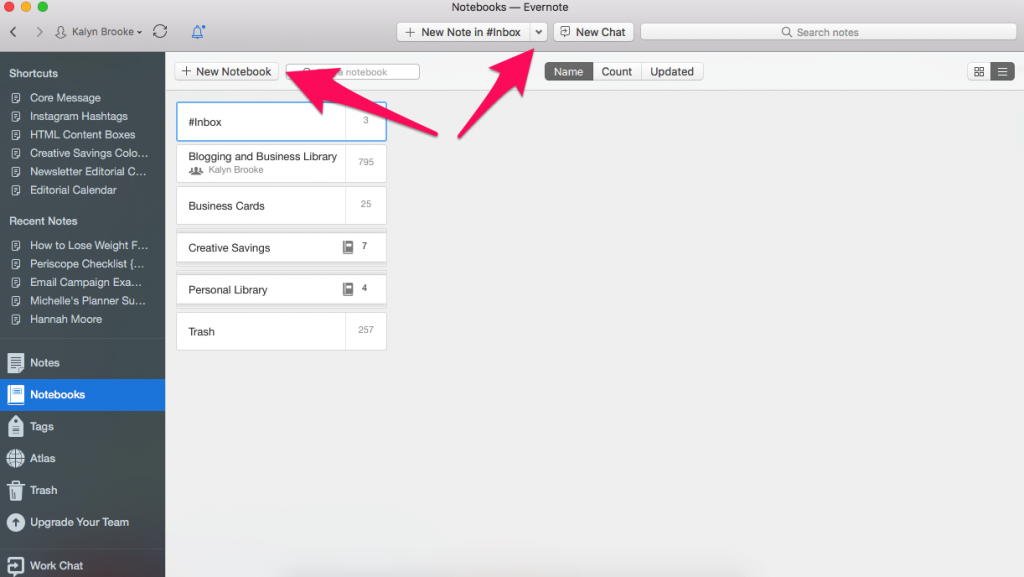
![]()
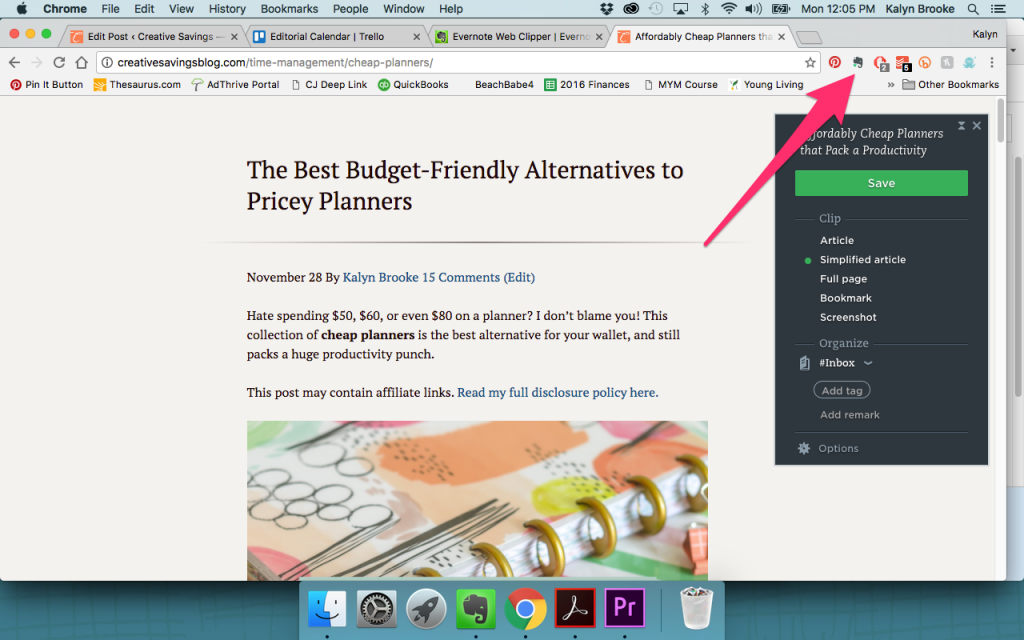
- Web Clipper – I love this option for saving articles I come across on the internet and emails I want to save, but don’t want lingering in my inbox. Learn how to install the web clipper HERE.
- Evernote Phone App – I use this app to create Notes on-the-go, and also to scan relevant information. The app will scan any document and turn it into a readable doc instead of a photo, without the need for an expensive scanner. Although, if you’ll be doing a lot of scanning, a scanner will probably be quicker!
FYI: Evernote is free for the most basic function, but I use the Premium version because it allows me to write on top of PDF’s, search for text in PDF’s, and forward emails into Evernote, among many other cool features. I also have a lot more space, which I need as a heavy Evernote user.
If you’re interested in learning more about Evernote, let me know in the comments and I’ll add more posts to my calendar! This is really just the tip of the iceberg—but I didn’t want to add to an already long post. 🙂
In the meantime, do yourself a favor and grab a copy of Evernote Essentials for a more comprehensive view of all the things you can do with this digital tool. This is my absolute favorite book on Evernote, and I reference it often! (UPDATE: Sadly, this book is no longer available.)
Do you use Evernote?
What questions do you have about this digital tool?
Disclosure: Some of the links in the post above are affiliate links. This means if you click on the link and purchase the item, I will receive an affiliate commission. Regardless, I only recommend products or services I use personally and believe will add value to my readers. Read my full disclosure policy here.
Hi – I just found you! And I think I’m starting to understand the basics…I guess the best way is to jump in with Evernote – which I’ve done more then once. But I’m tired of post its all over the place and not being bale to have everything accessible. So thank you and I will keep reading!
Yes! It’s so great for organization. Hopefully it’s helpful for you!
I use Evernote extensively. I use an Inventory stack notebook with notebook for each room in my house. I start with a 360°video of the room and add notes as we buy or fix or find user manuals or other paper-based info. It’s amazing.
I also have a recipe stack and a stamping stack for my crafting. I couldn’t function w/o it!
It’s such an amazing resource, isn’t it?? Thanks for sharing!
Do you think this could be closely comparable to dropbox? Are you able to share notebooks with others? The notebooks would be the equivalent to the folders in dropbox i think. Thanks!! You are amazing!!
Hi Hillary,
It’s not really a good replacement for dropbox. It’s not really designed as a storage solution as much as it is a note-taking document organization system. You can upload files and attach them to notes, but it wouldn’t be nearly as easy to locate those files in the future. Does that make sense?
Yes! Thanks for the help!
I’m hoping to set up Evernote and this info is very helpful, thank you! I would love to see how you organize your essential oils!
Hi Mikala,
Organizing my essential oils in Evernote…that’s a great idea, that I haven’t implemented yet. 🙂
I’m guessing Evernote is the Mac version of Microsoft OneNote? It seems they do all the same things, except that OneNote is free, and backs up online so you can access your notes from anywhere.
Evernote is actually not tied to any specific device! You can access it from anywhere, on pretty much any device {Phone, Tablet, Mac, PC or Web Browser}.
I used to have evernote on my old mac but never gave it a real shot. I’ve never even thought about using it as a digital organizations system.