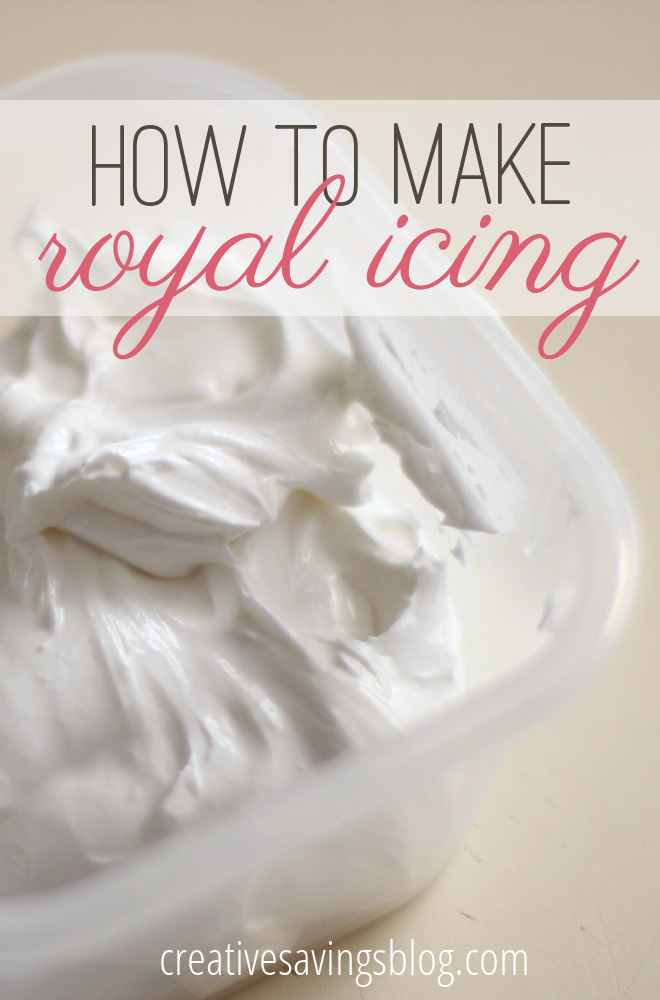
How to Make Royal Icing
This post may contain affiliate links. Read my full disclosure policy here.

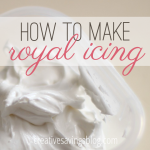
Royal icing can be so pretty, but at the same time it can be absolutely finicky. It does take a “touch,” but it’s one that practically anyone can master – I truly believe that!
My first experience with royal icing was in one of the Wilton cake classes I took. Even though I still use the basic Wilton recipe, I’ve tweaked it slightly based on what works for me.
You will find all my tips and tricks in this post, and I have tried to be as specific as possible. But if you do have any questions, or your royal icing doesn’t work like it’s supposed to, please feel free to leave a comment and I will answer as best I can!

It might take a few tries to get it right, but eventually you will get the hang of it. And just think how pretty your cookies will look!
How to Make Royal Icing
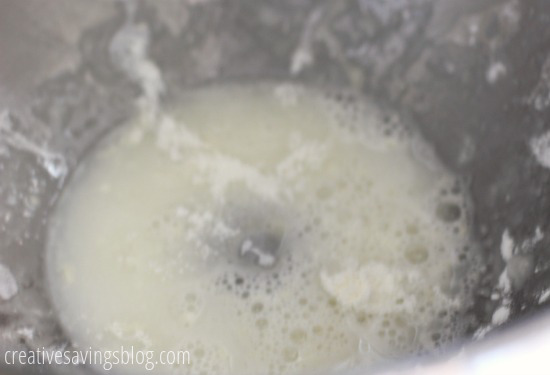
Step 1: Mix meringue powder and water in the bowl of a stand mixer. Whisk until slightly foamy.
There are a lot of recipes that say you must use a paddle attachment, and then there are those who say use the whisk. I’m not sure it matters, as I’ve tried it both ways, but I lean towards the whisk for mixing, and a paddle for colors if I need to.
If you don’t have meringue powder, you can just as easily find it on Amazon, or buy with a 40% coupon at a local craft store. I have searched for substitutions, but never found one that I was absolutely pleased with.
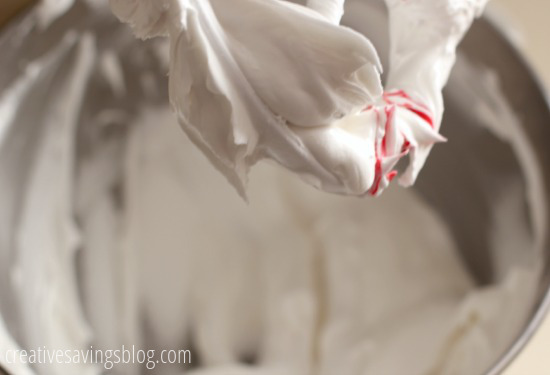
Step 2: Add in powdered sugar and cream of tartar, and mix on low speed for 10 minutes. The icing should take on a matte-like appearance.

Step 3: Transfer icing into separate containers based on how many colors or consistencies you want to use. You want a fairly stiff consistency for piping the outlines and decorating the tops of each cookie, and a more watery consistency for “flooding” the inside.
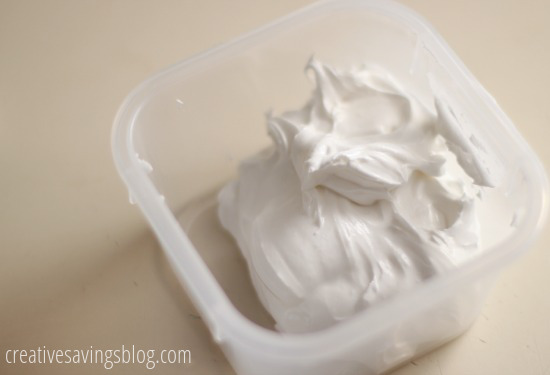
Step 4: Add a tsp at a time of warm water to the stiffest consistency that you want to use for outline and decorating, and stir by hand until fully incorporated {although sometimes I cheat and keep it in the bowl if I’m doing just one color}. Keep the lids of the other containers securely closed so the icing doesn’t harden and dry out.
When adding color, use gel icings rather than liquid, as they tend to set better. Only use a little at a time until you reach the color desired.
Step 5: Using a pastry bag, pipe around the edges of each cookie {I like to use Wilton tip #3}. Hold the tip close to the surface and slowly, but smoothly, follow the shape of the cookie. The farther away from the cookie you are, the more squiggle lines you will have!
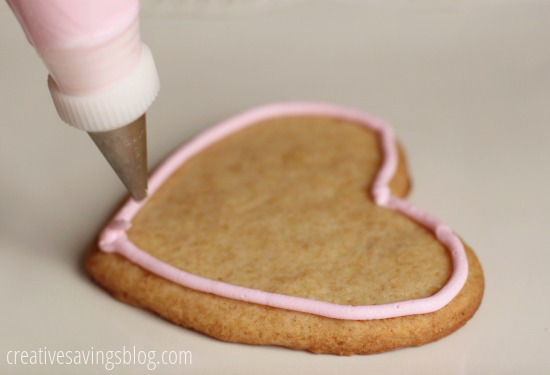
Step 6: Store tip down in a glass with just a little bit of water in the bottom to keep it from drying out. You will use these later for decorating.

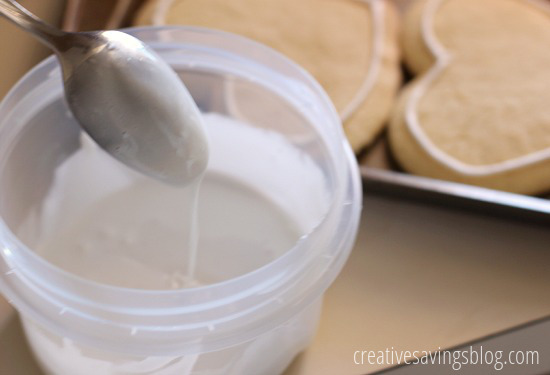
Step 7: Add a tsp at a time of warm water to the other consistencies to water down and use for “flooding” each cookie. You want it to be thin enough so that the icing drips off the spoon easily and then smooths in with what’s in the bowl within 5-7 seconds. If you make the icing too thin, just add more powdered sugar to thicken it up again.
Let icing sit for at least 10 minutes, then stir with a spoon to pop any bubbles that may have formed.
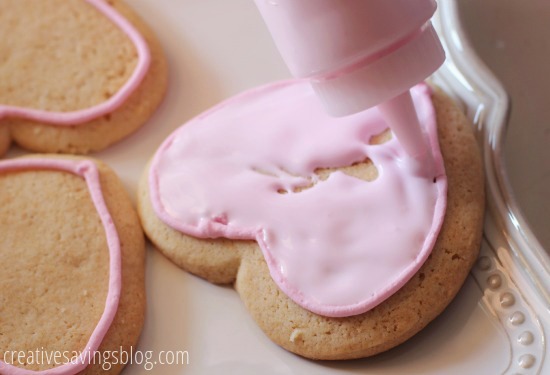
Step 8: Transfer icing to a squeeze bottle and “flood” the inside area of each cookie, pushing the icing around edges with the tip of the bottle, and filling in holes where needed. Allow to set at least 1-2 hours.

Step 9: Use the remainder of the thicker icing for piping decorations on top of the cookies, again, using Wilton tip #3. Let dry for about an hour, or until hardened, then pack carefully into a tupperware container, or into individually packaged treat bags for gifting.


Royal Icing
- Total Time: 15 minutes
- Yield: approx 3 cups of icing 1x
Description
If you’ve ever wanted to make fancy cookies, this recipe is your perfect go-to source!
Ingredients
- 4 cups powdered sugar
- 2 tbsp. meringue powder
- 5 tbsp. water
- 1/2 tsp cream of tartar
Instructions
- Mix meringue powder and water in the bowl of a stand mixer until slightly foamy.
- Sift powdered sugar and cream of tartar, than add to the mixer.
- Mix on low speed until the sheen has disappeared and the icing has a matte appearance (about 10 minutes).
- Transfer the contents of the mixing bowl into multiple air-tight containers, based on how many colors and consistencies you will need.
- Add a very small amount of warm water at a time and stir by hand until fully incorporated. Continue until the icing has reached a consistency appropriate for piping. (Remember, if you are having any difficulty piping, it is still too thick. Add a little more liquid and try again.)
- Using a pastry bag, pipe around the edges of each cookie. Make sure to keep the leftover icing covered at all times when not in use so that it does not harden.
- Once all the cookies have been edged, stand the pastry bag tip down in a cup with just a tiny bit of water to keep from drying out.
- Choose another container, and thin out by incorporating a small amount of water at a time, until the icing drips off the spoon easily when lifted and then smooths in with the icing still in the bowl {about 5-7 seconds} If you go too far and the icing is too thin, add more sifted powdered sugar to thicken it again. Let icing rest for at least 10 minutes, then stir with a spoon to pop any bubbles that may have formed.
- Once the icing has reached the desired consistency, transfer it to a squeeze bottle (or plastic bag with a hole in one corner), and flood the area surrounded by the piping on each cookie. If it does not completely spread to the edges, use the tip of the squeeze bottle to help it along. Allow to set 1-2 hours until hardened.
- Use the remaining thicker icing for piping decoration as desired.
- Prep Time: 15 minutes
- Cook Time: n/a
- Category: Dessert
- Cuisine: American
Keywords: royal icing, homemade icing

Total Cost: $1.26/batch
Don’t be discouraged if the icing doesn’t work out the first time, research what went wrong, ask here in the comment section, and try again. It is truly a technique worth mastering, and you will absolutely love the results!
Have you ever made royal icing before?
—
Visit this post for my favorite sugar cookie recipe, and a complete Valentine Conversation Hearts Tutorial.
Disclosure: Some of the links in the post above are affiliate links. This means if you click on the link and purchase the item, I will receive an affiliate commission. Regardless, I only recommend products or services I use personally and believe will add value to my readers. Read my full disclosure policy here.
I want to make butterflies that stand up after u pipe them on the wax paper and then put them in a book to shape them. Will they keep their shape for a period of time during a party.
Hi Anita, I would recommend using a stiff buttercream or fondant.
I want to make butterflies that stand up when they have been put unto wax paper to be formed will they hold their shape after they dry on the wax paper ?
Thanks for sharing! I’ve never tasted this icing before, so when I made it the other day, I was t sure how it is suppose to taste? Mine tasted a little on the “tart” side. Still sweet, but had a twang to the taste of the icing. What did I do wrong? It still set and did great at changing consistencies.l though..
★★★★★
Hi Amanda,
I don’t think you did anything wrong. This type of icing does have a touch of that “tart” flavor.
Why can we not use egg whites as the meringue as to meringue powder that is much more expensive
Hi Sarah! You can use egg whites, but if you want the icing to be shelf stable, the meringue is the way you’ll want to go. Otherwise, you’ll just have to refrigerate it.
It’s not fondant, it’s the frosting that is put on bakery birthday cakes. I want to make it myself but don’t know what recipe I’m looking for.
★★★★★
Hmmm…I’m sorry I can’t be of more help on this one. When I did wedding and birthday cakes I only worked with buttercream and fondant. 🙁
Is this what they call ‘birthday cake frosting’?
★★★★★
I don’t know. I would think of buttercream frosting on a cake over royal icing.
Stores don’t use what I call ‘birthday cake frosting’ on cakes, only bakeries do, and not all, anymore. It’s stiff and very surgary. I want to make my own to avoid all the preservatives and dangerous additives like EDTA. Any idea?
★★★★★
It sounds like fondant!
Here’s a recipe that is similar to the one I used when I was decorating cakes: https://www.foodnetwork.com/recipes/rolled-fondant-recipe-1916019
You can purchase fondant at Micheals, but I always feel like it tasted like plastic – so I would always make it from scratch.
Whats cream of tart and can i find meringue powder at walmart . ?
Here’s what Cream of Tartar looks like: http://amzn.to/2uXnPjL – You’ll typically find it in the spice aisle. Some Walmart’s will have Meringue powder in the baking aisle, but if yours doesn’t have it, you can get it on Amazon.