42+ Genius Ways to Organize Your Craft Supplies
This post may contain affiliate links. Read my full disclosure policy here.
When we were packing up our belongings to make the long-distance move to the Sunshine state, one of my New York friends glanced at the towering boxes in the corner of my craft area and confronted me with the cold hard truth: I was a craft supply hoarder.
What can I say? I like options when the crafty bug bites!
But this has led to a closet overflowing with a ridiculous amount of supplies. And when I say craft closet, I mean CRAFT closet. When I open the doors, it’s like Hobby Lobby on a slightly smaller scale.
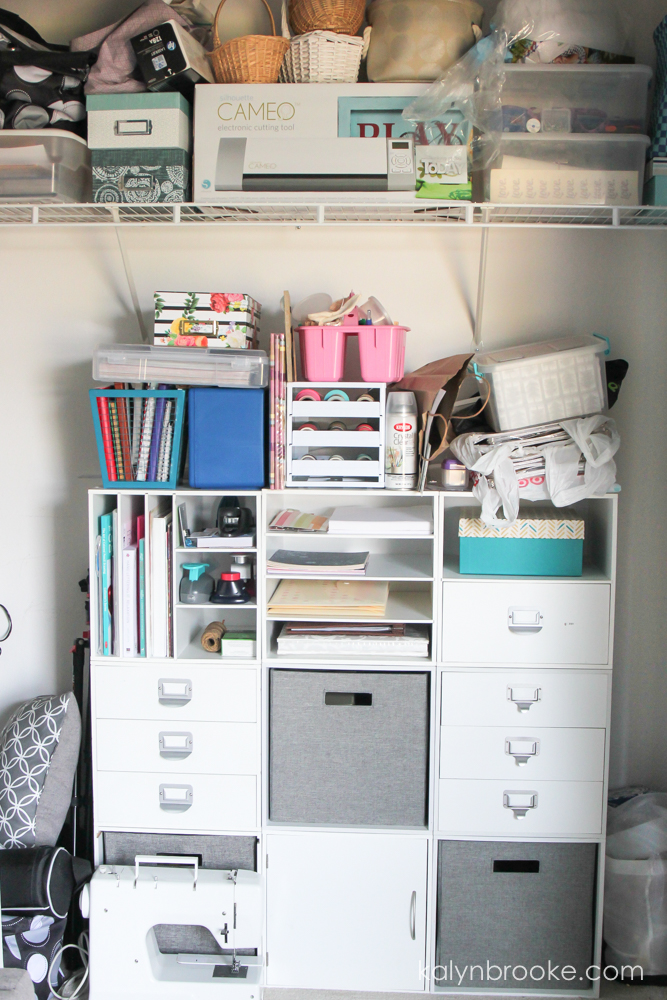
Here a sample of what’s inside:
- All my scrapbooking supplies from years past {even though I no longer scrapbook}
- Stamps and card making supplies
- Knitting supplies
- Cross stitch supplies
- Sewing supplies
- Lettering and drawing books
- Washi tape
- Thousands of printed photos
- My Silhouette and all it’s corresponding supplies
- Gift wrapping supplies {These are somewhat organized, thankfully!}
But as I embrace more simplicity and minimalism in my life, I find myself ready to let go of the clutter.
I don’t want all that stuff.
I want only to keep the few things that are most important to me and that I can see myself actually using when I feel the urge to create.
And so without further ado, my BIG home project for 2018 is decluttering and organizing my entire craft closet.
The First Step
I’m currently in the decluttering phase, weeding through items I don’t use anymore to donate or trash, but I’ve also been the on the hunt for inspiration so I know exactly how I want to organize what I have left.
And WOW, I found total craft organization goals!
It seemed selfish to keep all these awesome ideas to myself, so if you’re ready for a craft supply refresh of your own, browse my selections here to get inspired, too.

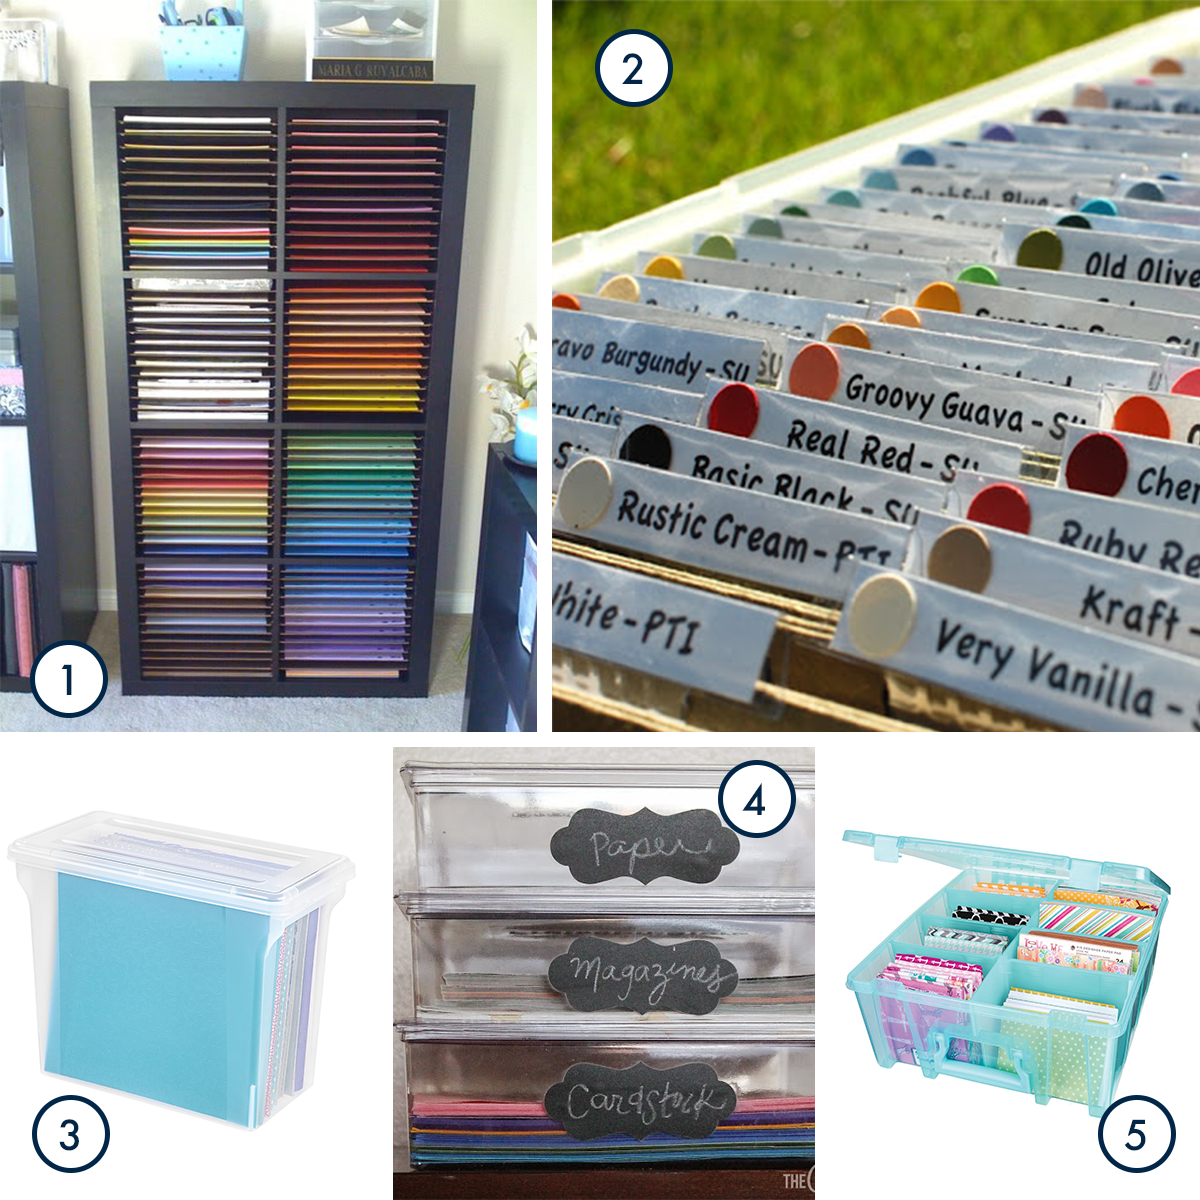
Scrapbook Paper:
- If you have a lot of paper to store, this paper bookcase (1) is a color explosion of organized eye candy.
- You can also store paper in a tote with accordion files organized by color (2). How swoon-worthy are those labels?!
- For smaller amounts of paper, you could grab a portable file box (3) for upright storage or stackable containers (4) for a horizontal look.
- Don’t forget the scraps! A divided container box (5) keeps paper neat, tidy, and color coordinated.
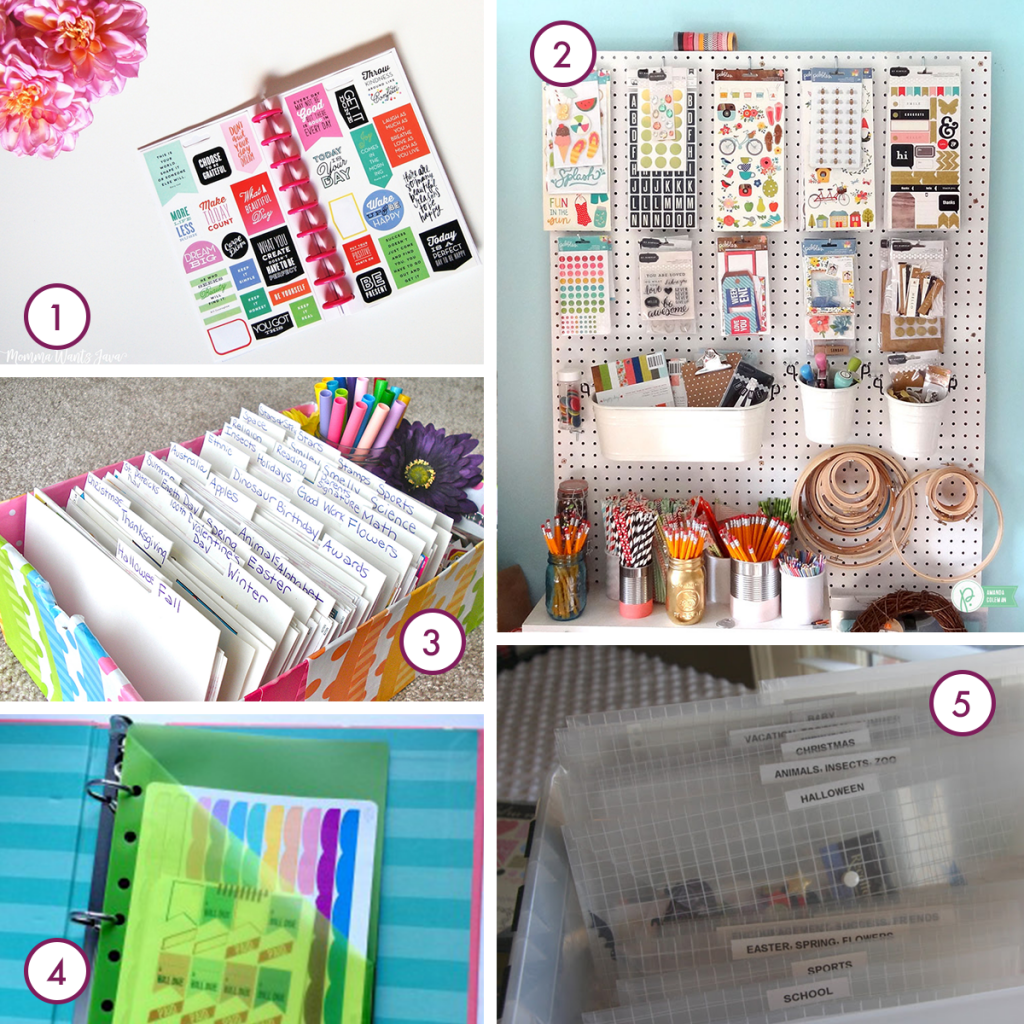
Stickers:
- For similar sized sheets, a disc-bound sticker book (1) makes it super easy to flip through and find the stickers you want.
- For various sized sheets, you can hang them on a pegboard (2), sort them in a box (3) or accordion file, or tuck inside a binder using pocket divider tabs (4).
- If you’re looking for something that uses a combination of methods, I love this bin full of clear plastic envelopes (5) sorted by category!
Stamps:
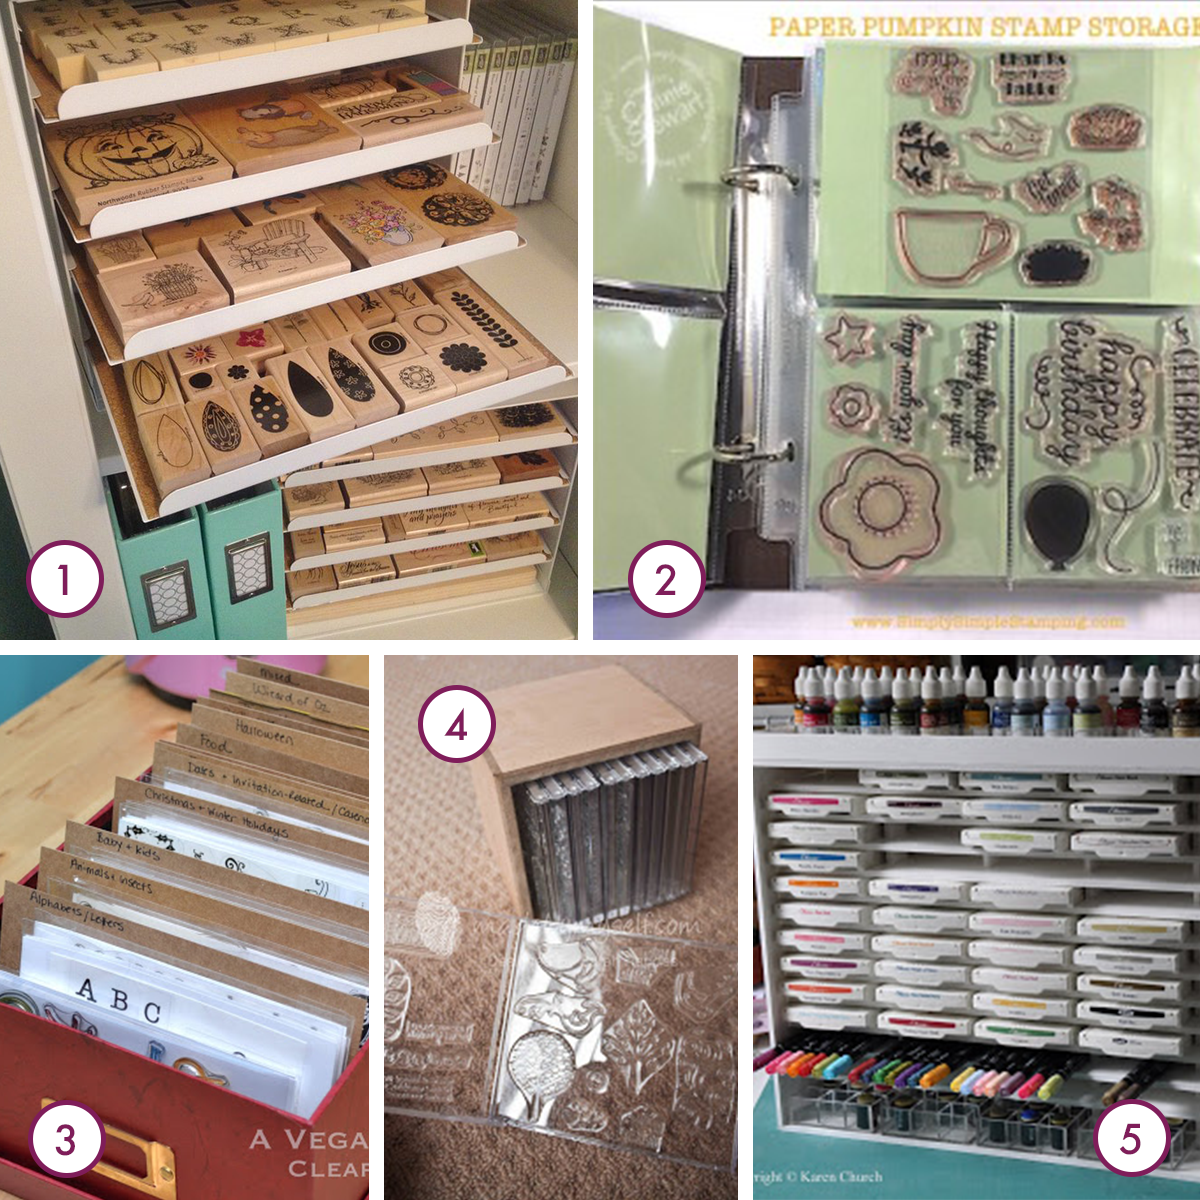
- If you have a large collection of wooden stamps, these letter trays from IKEA (1) are a fun way to store them. For a collection of less than 20, I would just keep them inside a small box.
- Keep clear stamps organized inside a three-ring binder. (2). Pocket pages are perfect for sorting smaller sets!
- You could also use a photo box with chipboard dividers (3) or store them inside empty CD cases (4).
- What about ink? Again, if you have a smaller collection, a storage box will do, but for larger sets, this DIY Foam Board Ink Pad Holder (5) is pretty cool! Or you can make one that’s a little sturdier and attach to a wall.
Washi Tape:
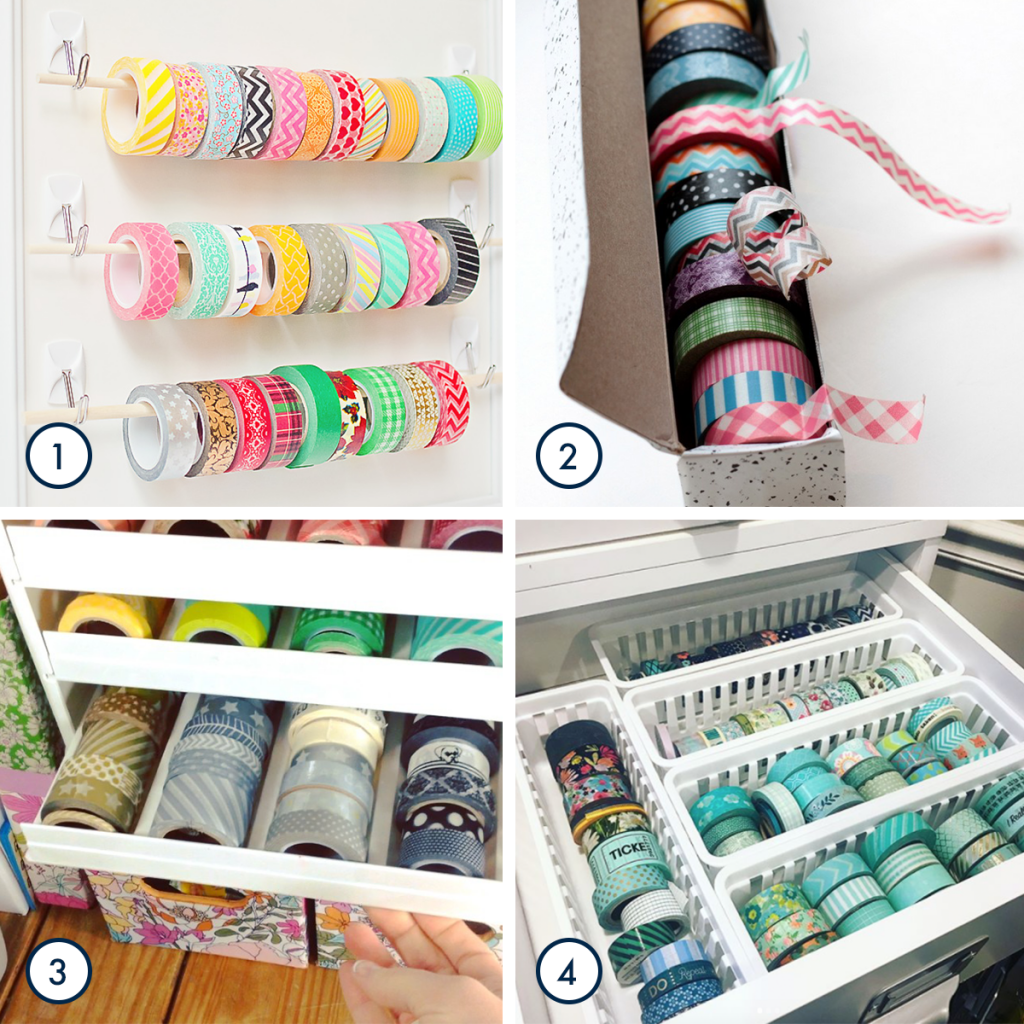
- If you want to display your washi tape on the wall, grab some command hooks, dowel rods, and a frame to put together this DIY storage solution (1).
- Upcycle an empty wax paper box into a washi tape box (2)! The sharp edge doubles as a DIY tape dispenser.
- This spice rack turned washi organizer (3) is another great way to riff off a product designed for a a different purpose.
- To store washi tape in a drawer, simple baskets (4) from Michaels or the dollar store do the trick.
Ribbon:
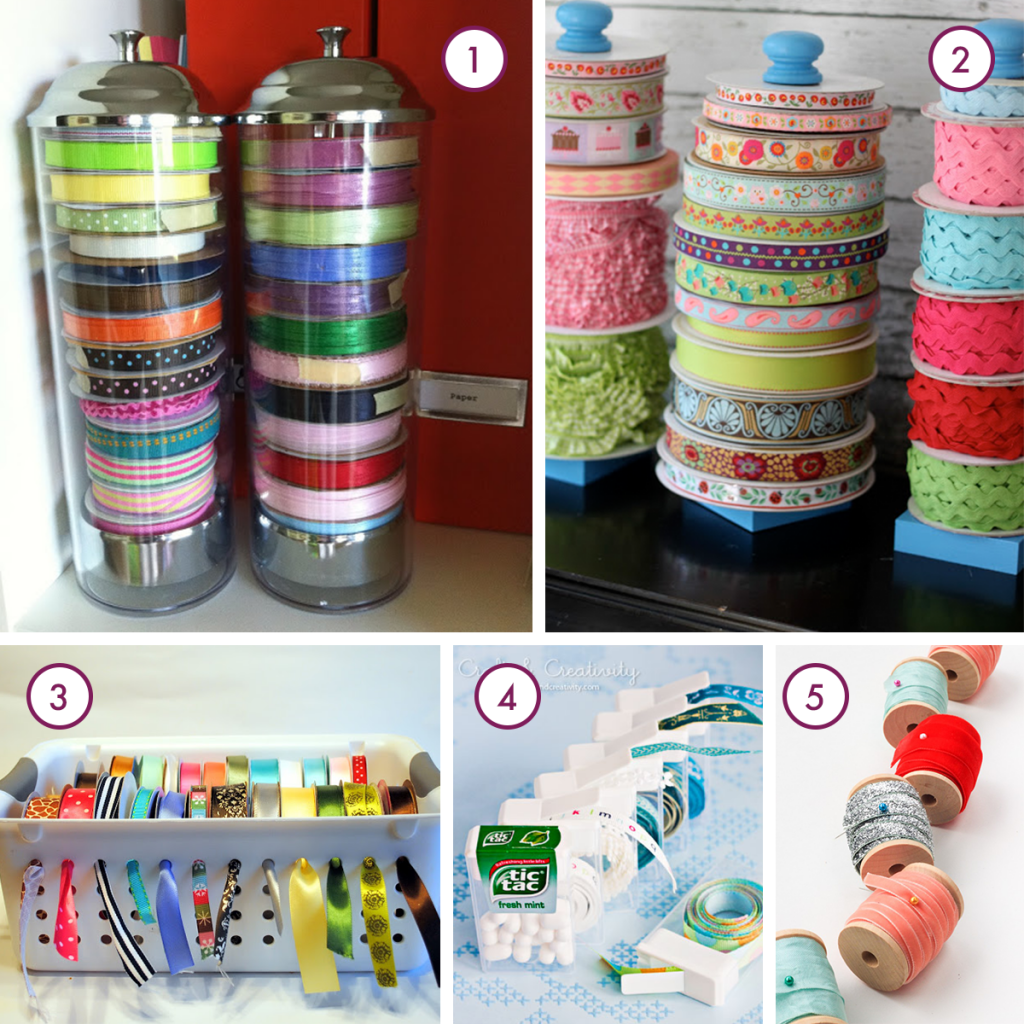
- Repurpose straw dispensers into ribbon holders (1), or you can DIY a similar solution (2). Paper towel holders work just as well!
- You won’t struggle with a tangled mess when you use this handy bin organizer (3).
- Empty Tic-Tac containers easily turn into small ribbon dispensers (4).
- Have a little bit of ribbon left over? Organize your scraps with wooden spools and a pin (5) to keep the ends in place.
Knitting and Crocheting:
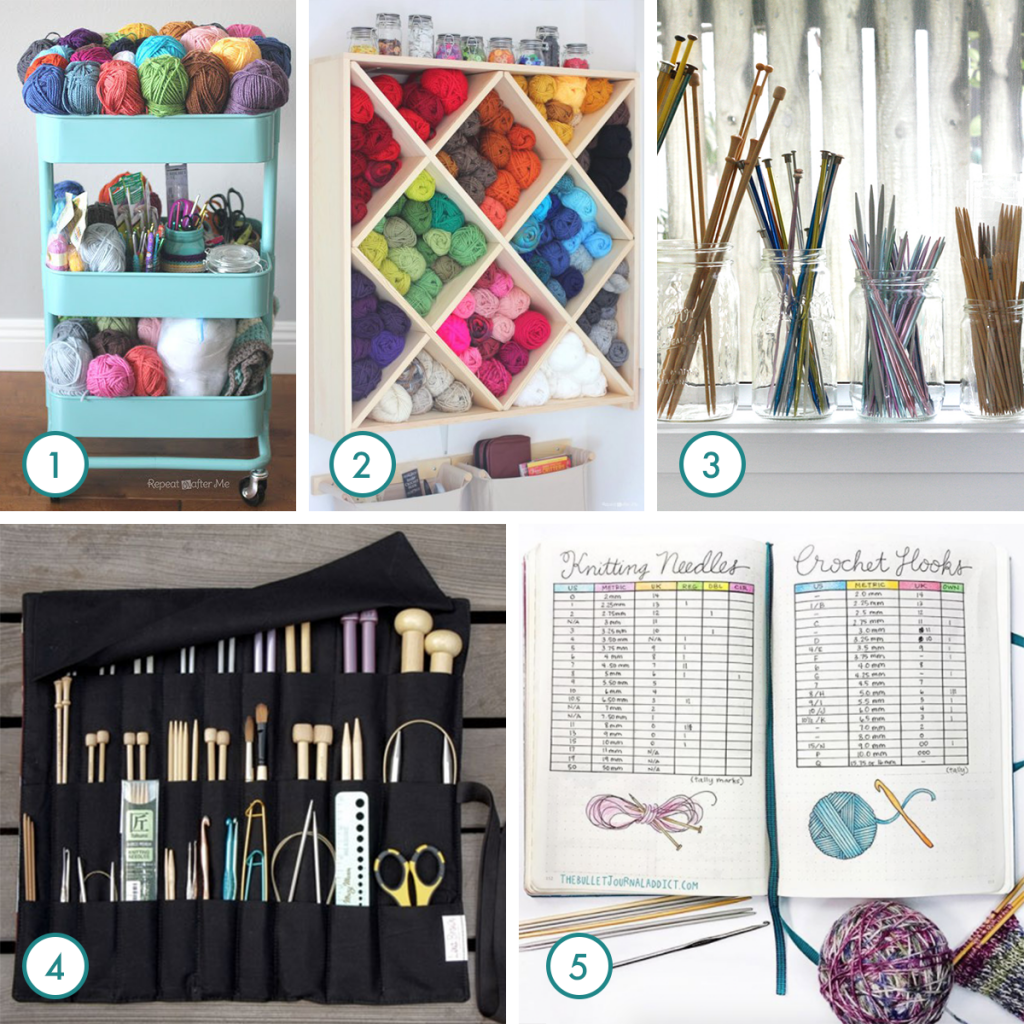
- Keep all your supplies together in an IKEA Raskog cart. (1). Yarn, needles, scissors…this organization solution stores it all!
- Hang a wine rack on the wall (2) and turn it into yarn storage.
- Put knitting needles on display with clear mason jars (3) or tuck them away in a rolled up organizer (4).
- Keep track of all your needles and hooks in a bullet journal (5) so you know exactly what you have in your collection.
Sewing:
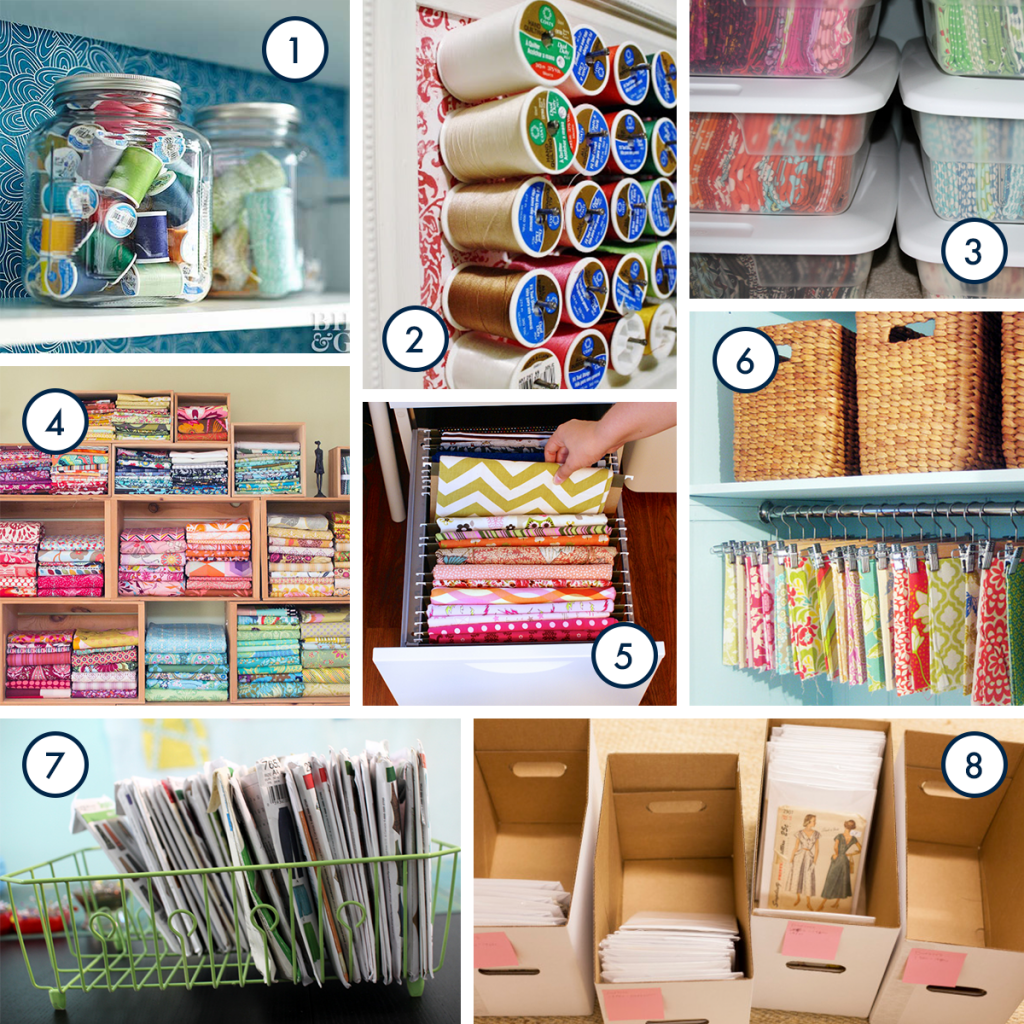
- Use clear cookie jars to store thread (1) or if you have a larger assortment, mount a spool rack (2) on the wall to showcase your collection.
- Separate fabric by color and keep them in handy bins (3) or you can use cubbies (4) to keep your fabric collection front and center.
- Want your fabric pieces separated rather than in piles? “File” each pattern (5) inside a filing cabinet. You can also hang fabric on pant hangers (6) to take advantage of the rod that’s probably already installed in your closet.
- Organize your patterns with a repurposed dish rack (7), or store a large collection in boxes (8) and catalogue with your phone.
Odds and Ends:
- Store buttons, beads, and brads with a spice rack organizer (1). The turntable feature makes every side accessible!
- DIY cereal box dividers (2) keep little items in their place, but behind closed drawers.
- For itty bitty embellishments, grab a plastic storage box with multiple dividers (3).
- This DIY Magnetic Board (4) uses metal tins and doubles as pretty wall art.
- Of course, you can always gather a small set of jars (5) to use, too!

All these swoon-worthy systems make my heart go pitter-patter! I can’t wait until I move onto the organization phase of my goal and can implement some of these ideas. Keep an eye out for what I end up using in a future blog post!
Now it’s time for me to get to work. 🙂
Do you have any big organizing projects on your list this year?
Disclosure: Some of the links in the post above are affiliate links. This means if you click on the link and purchase the item, I will receive an affiliate commission. Rest assured, I only recommend products or services I use personally and believe will add value to my readers. Read my full disclosure policy here.

Hi, I was wondering where you got the storage shelf that is in your craft closet?
I got the boxes at Micheals. The shelf was there when we bought the home BUT I know they have that shelving at Lowes, Home Depot, and the Container Store. It’s called “Ventilated Shelving.”
Love all the ideas ,as I am trying to organize my craft room and it’s so scary and overwhelming but since I have been checking out the ideas I have a little bit of faith in myself now,thank you for the awesome tips.
You’re welcome! Take it one step at a time and you’ll be fine. 🙂
I love ALL your adorable AND practical ideas! My small space is out of control, and overwhelming!! I’m looking forward to putting many of your treasured finds into use to make my small space both user friendly and inviting!!
Aw, Thank you Debbie!
This is my dream! I love having an organized home! I want to leave work now to try some of these out!
It’s funny how once I get in the mood to organize I completely lose track of time until I’m sick of it.
Organized craft supplies make my heart swoon! So many drool-worthy photos and ideas in this round-up. And I’m so very honored you featured my “filed fabric” post. I still love to open that bottom drawer of the filing cabinet now and then just to heave a sigh of relief. 😉
It’s funny how seeing things organized can be so relaxing. I’m totally with you on that! 🙂
Such beautiful organizing ideas. I love organizing my craft room because it combines two of my favorite things.