Every Place You Need to Change Your Address When You Move
This post may contain affiliate links. Read my full disclosure policy here.
Since getting married, we've moved to five different addresses (we're about to add a sixth!). At some point in each moving process, I inevitably forget to change my address somewhere.
Just the other day, I panicked because my default address with JCPenney.com belonged to our Florida apartment (where we no longer live) and I totally missed it during the checkout process!
After spending the majority of my afternoon on the phone with UPS and JCPenney (the latter could not stop my shipment), I convinced UPS to hold my package at the warehouse until I could drive there to pick it up.
But even then, I had a small window of time to do so before they would deliver it to whoever now lives in apartment 204.
Ack!
Moving comes with it's own set of stressors (psst…here are 8 Moving Tips Guaranteed to Make It Stress-Free!), and changing your address just might be the most time-consuming one.
It's astounding how many places keep your address on file, and you never even realize it until you have to update them ALL.
Luckily, I've got something to help you with that!
But first, when do you make the switch?
When you know your exact moving date, my American friends can update it with the Post Office HERE. You'll be able to specify the exact date when you want your mail forwarded. For my international folks, just check with your particular mail service.
Mail should begin forwarding 7-10 days after that date and will continue for the following 12 months. With the exception of magazines, which the Post Office will only forward for 60 days.
Although at our current house, we still get mail from the past owner (four years later!), so perhaps that 12-month period isn't quite set-in-stone! Good news for when you forget to update your address somewhere, yes?
(Again, less likely if you use the change of address checklist printable I'm about to show you!)
Where to Change Your Address
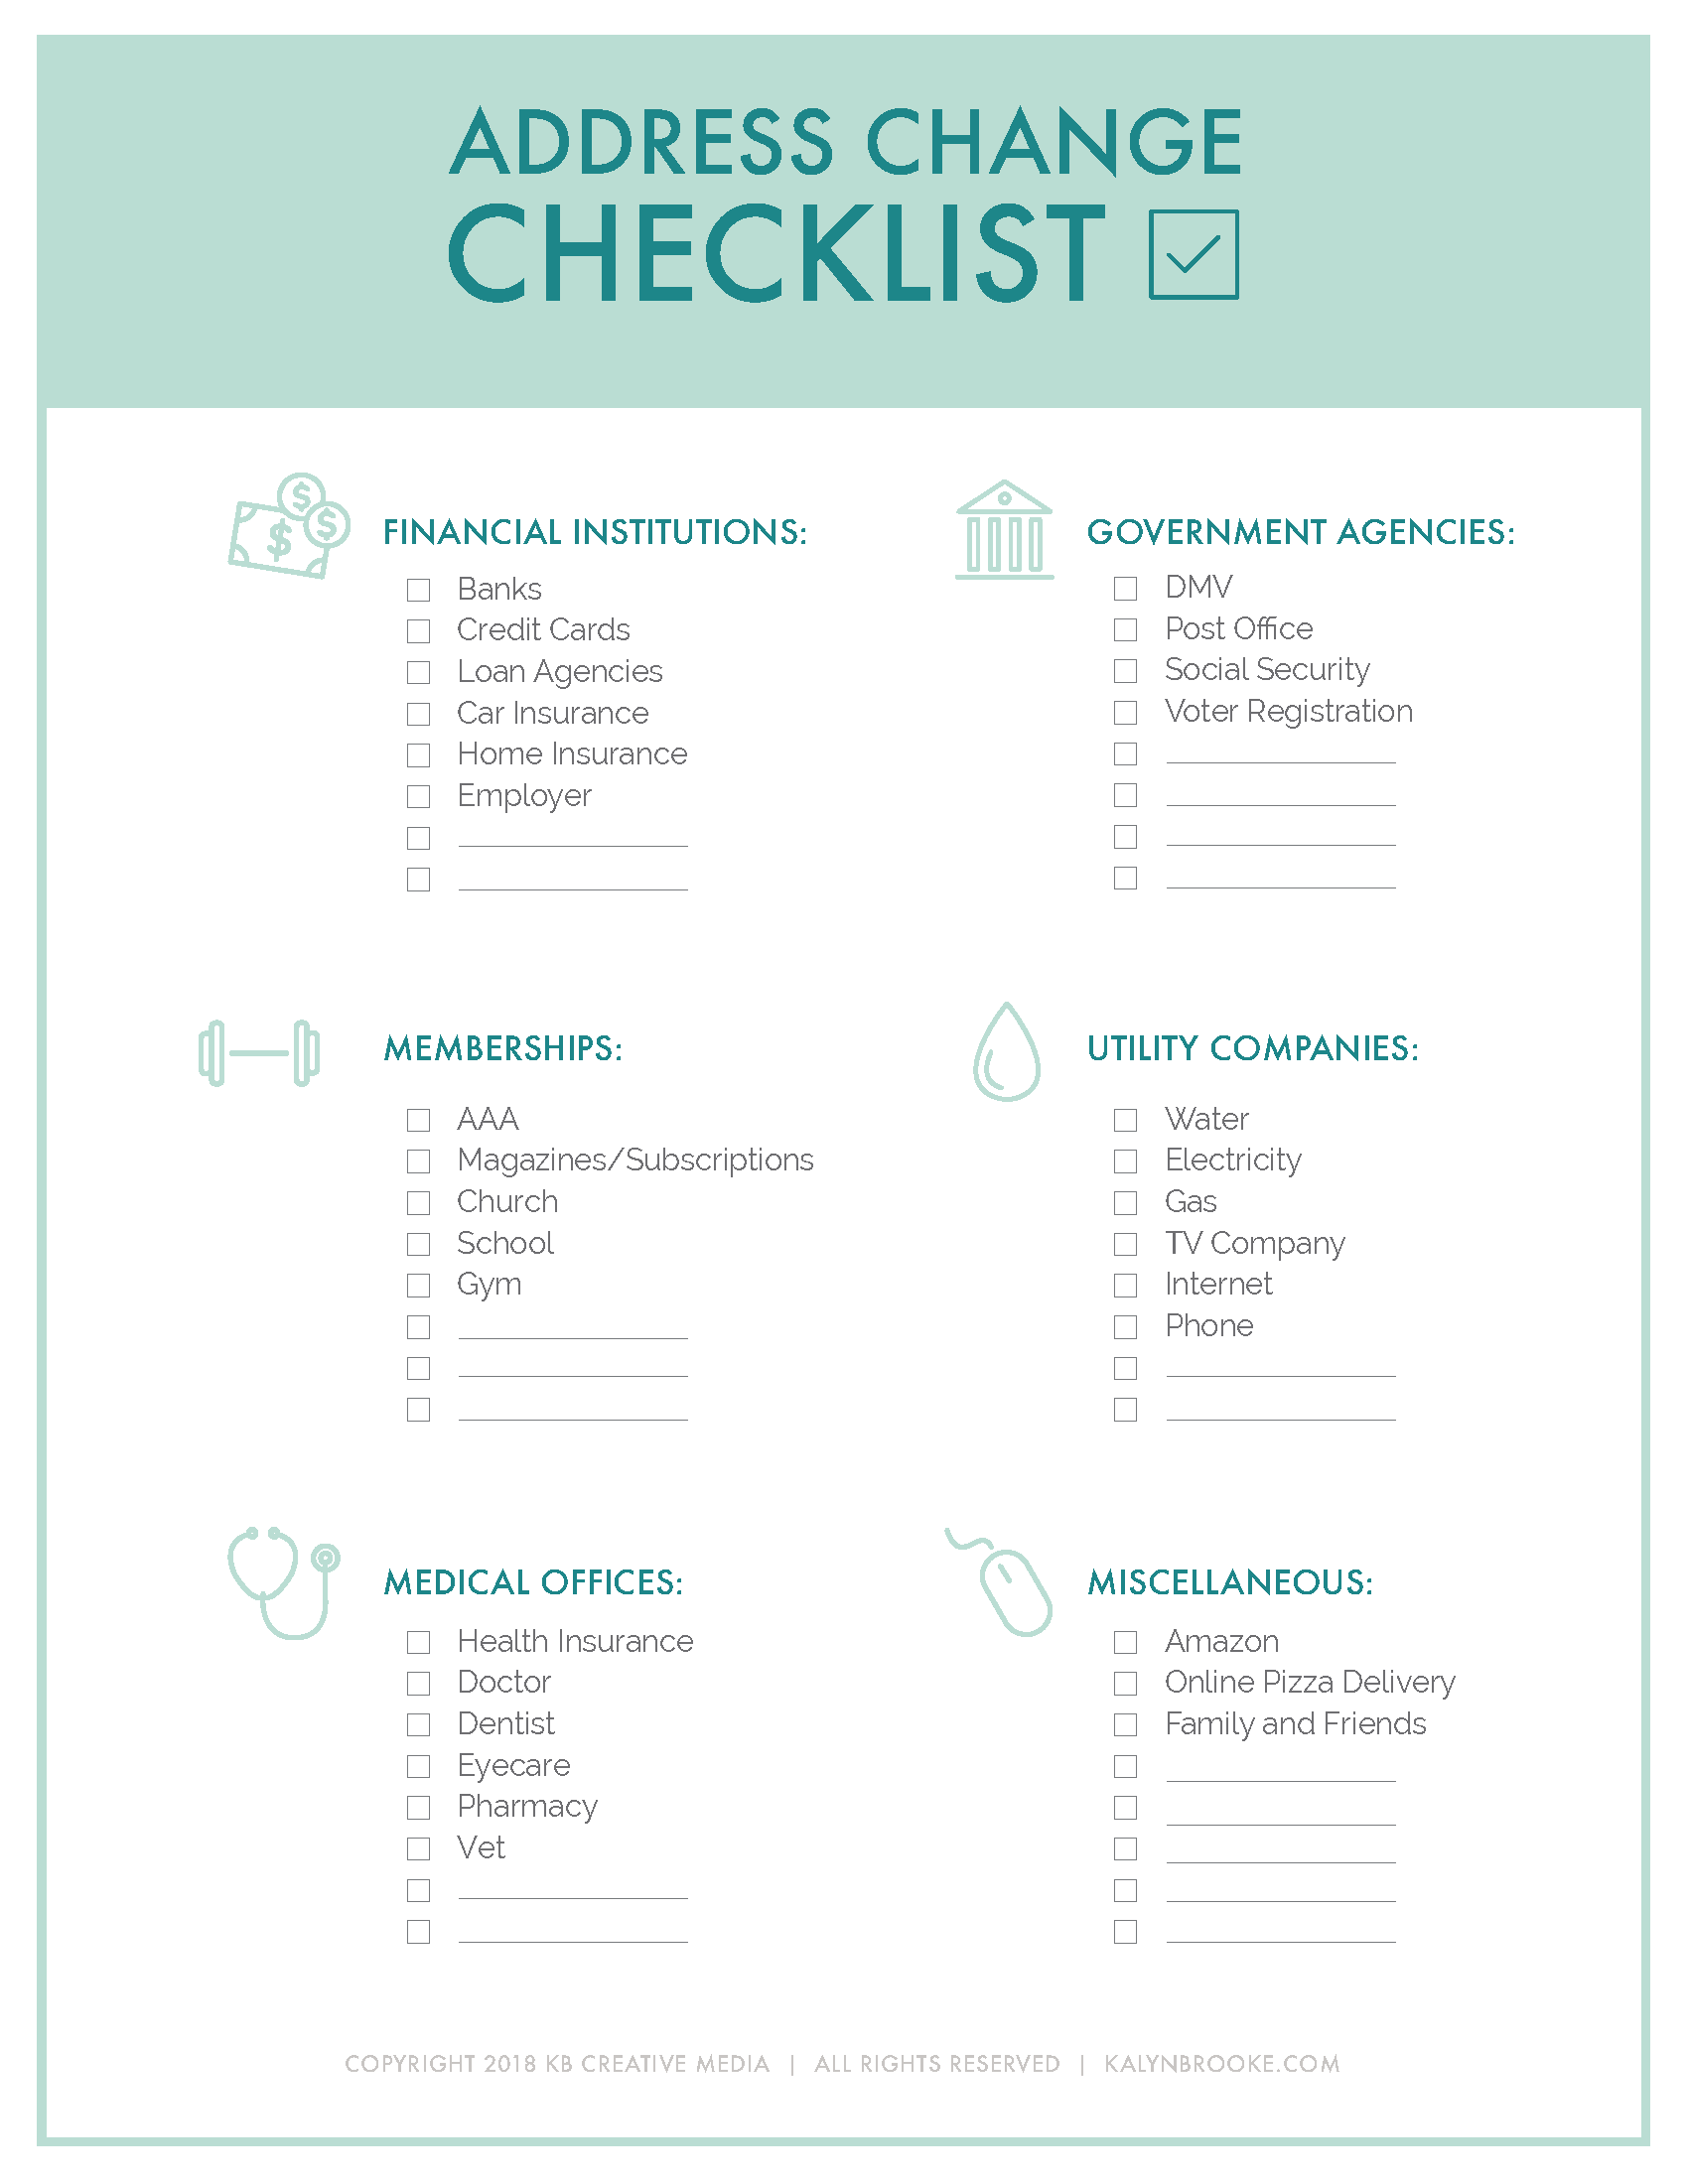
Here are the main categories that should be on your list:
- Financial Institutions
- Memberships
- Medical Offices
- Government Agencies
- Utility Companies (even if your move puts you with a different utility company!)
- Subscription services (especially magazines!)
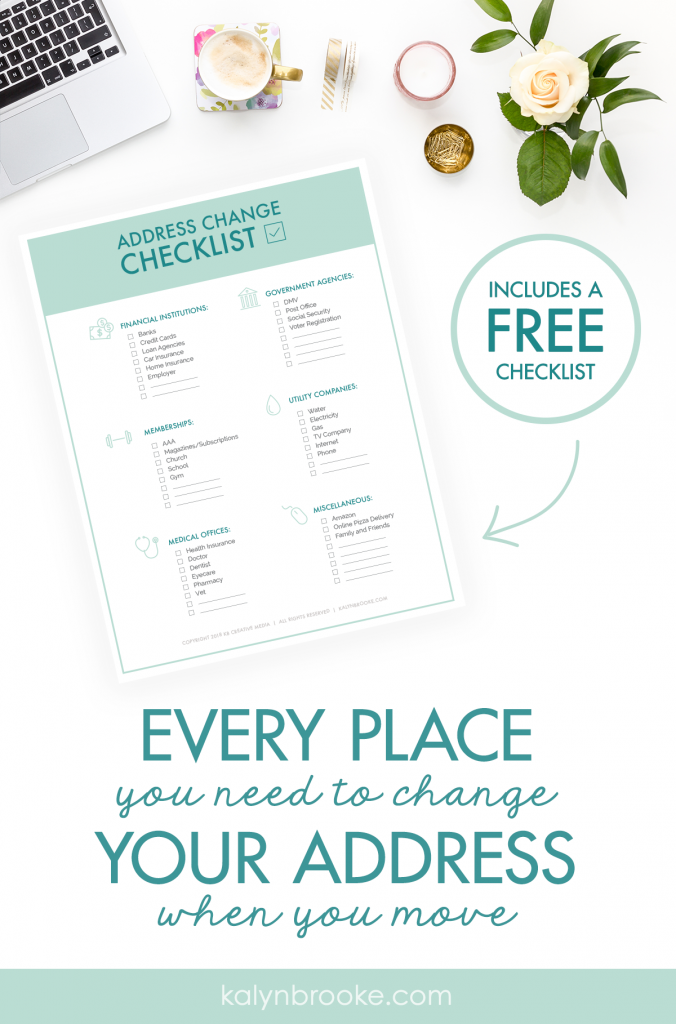
And because I adore organizational shortcuts, I've already labeled these categories for you via an Address Change Checklist!
Packing up for a big move, or know someone who is? This FREE Address Change Checklist is a great resource!
On this printable, I also made sure to add a few extra spaces for all those miscellaneous addresses that not everyone has (like, JCPenney…ahem), so this printable is versatile for absolutely anyone.
I would call this change of address checklist printable my solution to every mover's need for a convenient and comprehensive checklist, but that sounds a little egotistical. And it's not quite foolproof since I apparently forgot to update my JCPenney address even with this checklist by my side. Oops!
But at least the process is more organized so you miss less, right?
Right.
Download this Change of Address Checklist Printable below:
Here's the fun part…
Once you've made all the boring updates, you're ready for the fun ones—notifying family and friends with cute moving announcements!
You can go the DIY route with decorated paint swatches OR you can use a site to print the announcements for you.
Here are the two I like:
[show_shopthepost_widget id=”3283431″]
Oh! And don't forget to purchase new address labels or a self-inking stamp. Am I the only one who gets excited over choosing a new design?
Psst…here's a peek at the one I'm grabbing (and if you're a little confused, here's why!).

I hope these tips give you a place to start so you can move into your new apartment or home, or even transition to a P.O. Box with ease…and style.
And if you shop at JCPenney, don't forget to change your address there too!
When was the last time you moved?
Disclosure: Some of the links in the post above are affiliate links. This means if you click on the link and purchase the item, I will receive an affiliate commission. Rest assured, I only recommend products or services I use personally and believe will add value to my readers. Read my full disclosure policy here.
Please send me the donwloadable change of address checklst if possible. It will not download for some reason. The page is buffering.
I’m so sorry you’re having trouble! Please send a message to [email protected] and we’ll help you sort things out!